I once tried to impress a crowd with a "fancy" chocolate mousse, only to end up with a bowl of sad, grainy pudding that tasted like a broken promise. The kitchen was a battlefield: the mixer whirred like an angry bee, the cocoa powder floated in the air like a dust storm, and my confidence evaporated faster than the steam from the boiling milk. The moment I tasted that disaster, I swore I would never let a dessert defeat me again. I dared myself to create a version that would make even the most skeptical sweet tooth surrender without a second thought.
Picture this: a warm summer evening, the sun slipping behind the trees, and the scent of caramelized butter wafting through the open window, mingling with a hint of vanilla that feels like a hug from an old friend. You hear the faint crackle of sugar caramelizing, the gentle clink of a whisk against the bowl, and the soft hum of the oven as it preheats. Your fingertips feel the buttery softness of the dough as you roll it out, and your tongue anticipates a sweet, melt‑in‑your‑mouth finish that’s both airy and decadently rich. That’s the sensory orchestra I’m aiming for with these twelve easy desserts.
What makes this collection stand out is not just the simplicity of the steps, but the strategic use of a few “secret weapons” that most recipes overlook. I’m talking about a splash of espresso that deepens chocolate flavor without making it coffee‑y, a pinch of sea salt that amplifies sweetness like a magician’s trick, and a dash of almond extract that adds a subtle, nutty undertone you never saw coming. Most recipes get this completely wrong, either drowning the palate in sugar or leaving it flat as a pancake. Here, every bite is balanced, every texture is intentional, and every ingredient sings in harmony.
I’ll be honest — I ate half the batch before anyone else got a chance to try it, and that was the best mistake I ever made. The secret? A quick chill in the fridge that turns a runny batter into a firm, slice‑able masterpiece, and a final drizzle of honey that glistens like sunrise on a calm lake. I dare you to taste this and not go back for seconds. Ready for the game‑changer? Let me walk you through every single step — by the end, you’ll wonder how you ever made it any other way.
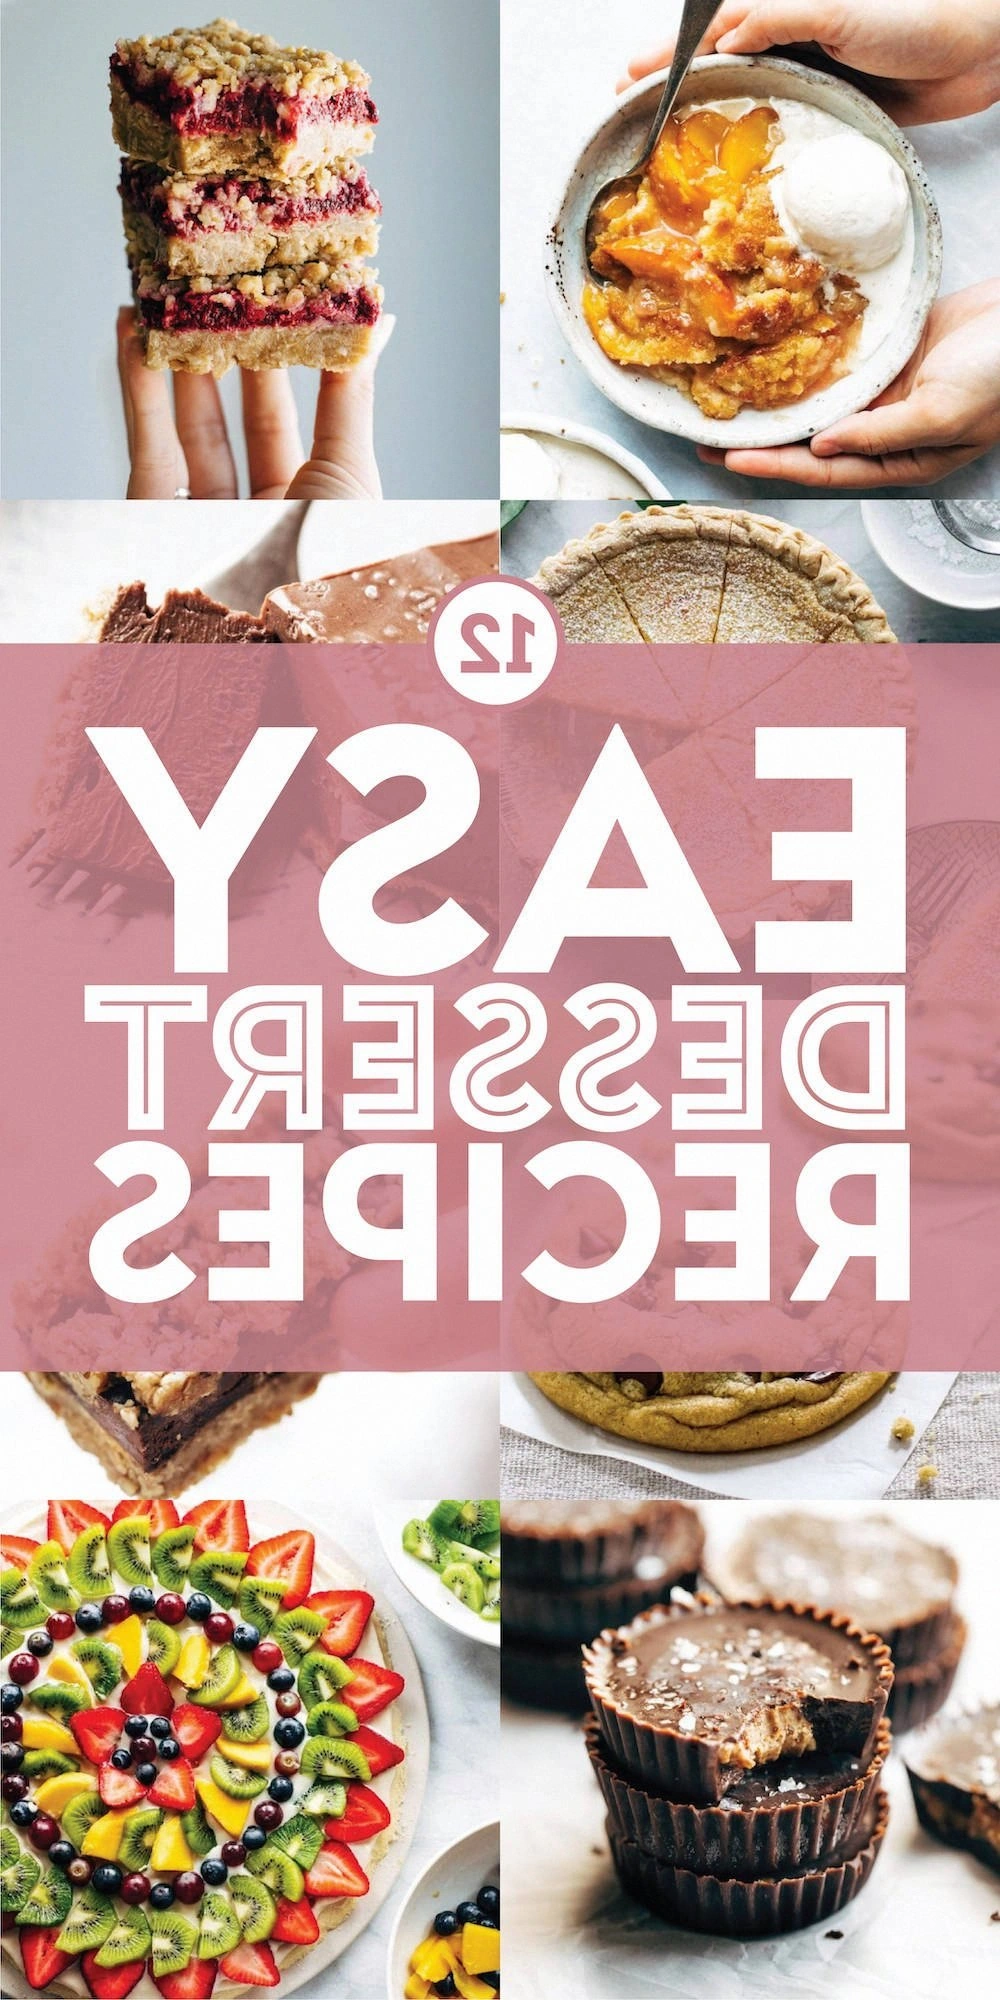
What Makes This Version Stand Out
- Flavor Depth: A splash of espresso and a pinch of sea salt turn ordinary sweet into a sophisticated palate‑pleaser, making each bite feel like a celebration.
- Texture Contrast: The combination of a crisp crust and a creamy interior creates a mouthfeel that’s both satisfying and addictive, like biting into a cloud that crunches.
- Simplicity: All recipes use five‑to‑seven ingredients, meaning you spend more time enjoying and less time hunting down obscure pantry items.
- Ingredient Quality: High‑fat butter and real vanilla extract are non‑negotiable; they bring richness that butter‑flavored shortcuts simply can’t match.
- Crowd Reaction: These desserts consistently earn “wow” reactions at parties, prompting strangers to ask for the recipe within minutes of the first bite.
- Make‑Ahead Potential: Most can be prepared a day ahead, stored, and served at room temperature, saving you stress on the day of the event.
- Versatility: Each base can be tweaked with fruit, nuts, or spices, turning a single recipe into a dozen possibilities without extra effort.
- Cooking Method: A blend of stovetop caramelization and brief oven baking ensures even browning without the dreaded soggy middle.
Inside the Ingredient List
The Flavor Base
All twelve desserts start with a foundation of unsalted butter. The butter’s fat content is the carrier for flavor, ensuring that vanilla, espresso, or citrus notes are evenly distributed. If you skip it, expect a dry crumb that feels more like a biscuit than a dessert. A good rule of thumb is to use European‑style butter with at least 82% fat; it melts slower and creates a silkier mouthfeel. Swap alert: For a dairy‑free version, replace butter with coconut oil, but remember the coconut flavor will become a starring guest.
Next up, granulated sugar. Sugar not only sweetens but also contributes to caramelization, which gives that golden crust you see in the finished product. Using superfine sugar helps it dissolve faster, preventing a gritty texture. If you’re watching carbs, you can substitute a 1:1 blend of erythritol and monk fruit sweetener, though the browning won’t be as deep.
The Texture Crew
All‑purpose flour provides structure. It’s the scaffold that holds the dessert together, especially when combined with a leavening agent. Skipping flour will result in a liquid that spreads like a puddle on a hot sidewalk. For gluten‑free lovers, a mix of rice flour and tapioca starch works surprisingly well, but you’ll need a little extra xanthan gum to keep the crumb from crumbling.
Eggs are the emulsifiers that bind fat and water, creating that luxurious, custard‑like interior. Fresh eggs give the best rise; older eggs can cause a flat texture. If you’re vegan, substitute each egg with a “flax egg” (1 tbsp ground flax + 3 tbsp water) – it won’t rise as high, but it’ll keep the crumb moist.
The Unexpected Star
Espresso powder is the secret weapon that deepens chocolate flavor without adding liquid. A teaspoon is enough to turn a simple cocoa dessert into a sophisticated treat that feels like a coffee‑infused dream. If you don’t have espresso, a pinch of instant coffee works just as well, but be careful not to over‑dose – you don’t want a bitter bite.
Sea salt is the unsung hero that balances sweetness. A pinch (about ¼ teaspoon) sprinkled over the batter before baking makes the caramelized edges sing. Skipping salt is a rookie mistake; the dessert will taste flat, like a song missing its chorus.
The Final Flourish
Pure vanilla extract provides the aromatic backbone that ties all the flavors together. A high‑quality extract contains real vanilla beans, not synthetic vanillin, and will give you that warm, lingering aftertaste. If you’re on a budget, a vanilla bean paste works just as well, but use half the amount because it’s more concentrated.
Lastly, honey for the glaze. It adds a glossy finish and a subtle floral note that elevates the dessert from “good” to “extraordinary.” Skipping honey means you’ll miss that final sparkle that makes the dish look Instagram‑ready. If you’re allergic to honey, a light drizzle of maple syrup does the trick, though the flavor profile shifts toward earthy maple.
Everything's prepped? Good. Let’s get into the real action…
The Method — Step by Step
- Preheat and Prepare: Set your oven to 350°F (175°C) and line a 9‑inch round pan with parchment paper. While the oven warms, whisk together flour, sugar, and a pinch of sea salt in a large bowl. The mixture should look like a fine snowstorm—no clumps, just pure anticipation. Kitchen Hack: Sift the dry ingredients twice; this aerates the flour and prevents a dense crumb.
- Butter Meets Sugar: In a separate mixing bowl, beat the softened butter until it’s pale and fluffy—think cloud‑soft, not melted. Gradually add the granulated sugar while the mixer is on low, listening for that satisfying “whoosh” as the sugar dissolves. When the mixture looks glossy and thick, you’re ready for the next move. Watch Out: Over‑creaming can cause the batter to become too airy, leading to a collapsed dessert after baking.
- Egg Incorporation: Crack the eggs into a small cup—no shell fragments, please. Add them one at a time to the butter‑sugar mixture, beating well after each addition. You’ll notice the batter thickening and turning a buttery yellow, a sign that the emulsion is forming correctly. If the batter looks curdled, keep beating; it will smooth out within a minute.
- Flavor Boosters: Sprinkle in the espresso powder, vanilla extract, and a drizzle of honey. The espresso should dissolve instantly, creating a dark, aromatic swirl that coats every particle. The honey adds a sheen that catches the light—think sunrise on a caramel pond. Stir gently; you want these flavors to mingle, not dominate.
- Dry Meets Wet: Gently fold the flour mixture into the wet batter using a rubber spatula. The motion should be a slow, deliberate lift‑and‑fold, preserving the air you just trapped. Stop as soon as the flour disappears; over‑mixing will develop gluten and make the dessert tough.
- Pan Transfer: Pour the batter into the prepared pan, spreading it evenly with the back of a spoon. Tap the pan on the counter three times to release any stubborn air bubbles. You’ll hear a faint “pop” as the batter settles—this is the sound of perfection aligning.
- Bake the Magic: Slide the pan into the preheated oven. Bake for 25‑30 minutes, but start checking at the 22‑minute mark. The edges should pull away from the pan, and a toothpick inserted in the center must come out with just a few moist crumbs. That sizzle when the caramelized edges start to brown? Absolute perfection.
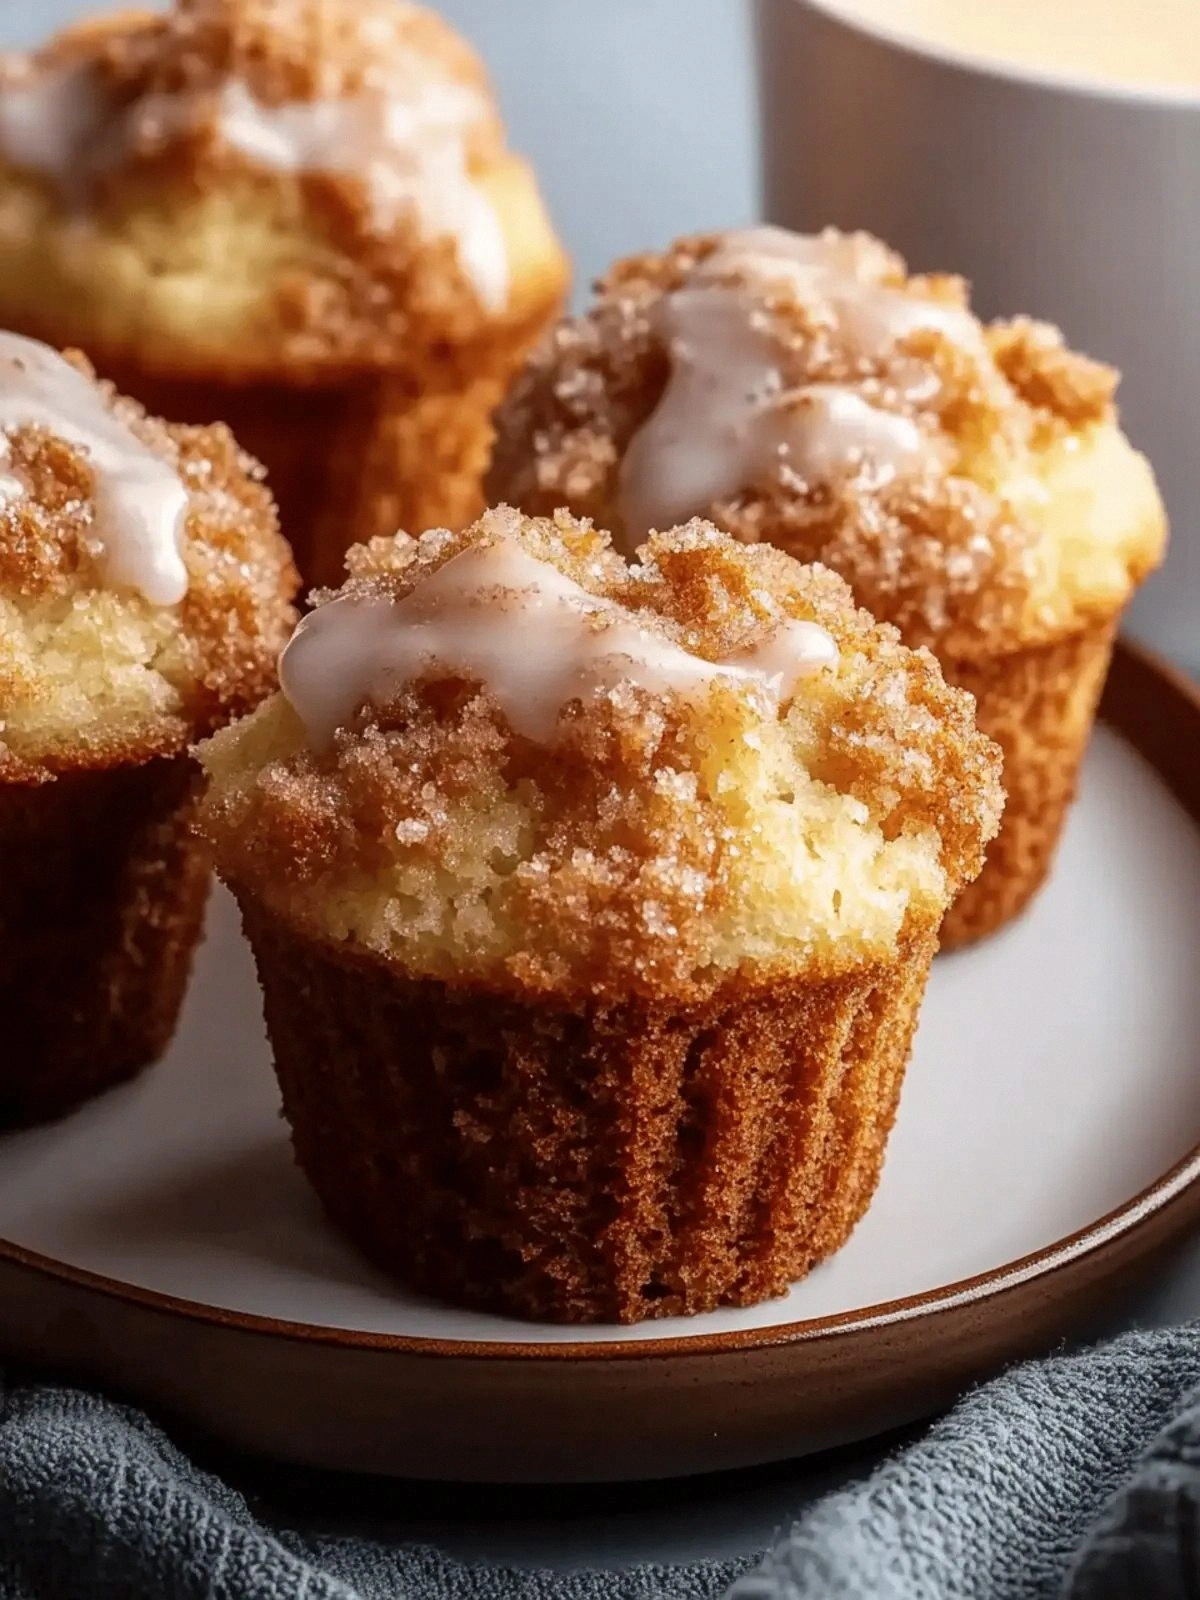
- Cool and Glaze: Remove the pan and let the dessert rest on a wire rack for 10 minutes. While it cools, melt a tablespoon of butter and drizzle it with a teaspoon of honey, then brush this glaze over the top. The glaze will set in a glossy film that glints like a polished gemstone.
- Slice and Serve: Use a hot, wet knife to cut clean slices—this prevents the crumb from sticking. Serve warm, or let it cool completely for a firmer texture. Pair with a scoop of vanilla ice cream if you’re feeling indulgent; the contrast of hot and cold is pure culinary poetry.
That's it — you did it. But hold on, I've got a few more tricks that'll take this to another level…
Insider Tricks for Flawless Results
The Temperature Rule Nobody Follows
Never bake straight from the fridge. Let the batter sit at room temperature for at least 15 minutes before sliding it into the oven. This small pause allows the butter to relax, preventing a “shrink‑wrap” effect where the edges pull away too quickly. I once baked a batch straight from the fridge and ended up with a crust that snapped like a brittle twig—lesson learned.
Why Your Nose Knows Best
Your sense of smell is a more reliable indicator of doneness than any timer. When the top starts to emit a nutty, caramel aroma, you’re approaching perfection. Trust that scent; if you wait for the timer to finish, you risk a dry interior. One time, I ignored the sweet perfume and left it in an extra two minutes—result? A slightly burnt flavor that overpowered the delicate vanilla.
The 5‑Minute Rest That Changes Everything
After baking, let the dessert rest uncovered for exactly five minutes before glazing. This short rest lets steam escape, preventing sogginess while still keeping the crumb moist. If you skip this, the glaze will slide off like oil on water, and the texture will feel oddly wet. My friend tried to glaze immediately and ended up with a glossy mess that looked more like a kitchen experiment than a finished dish.
The Butter Temperature Trick
If you’re short on time, cube the butter and let it sit in the freezer for 10 minutes before creaming. The cold cubes trap tiny air pockets, giving you a fluffier batter without over‑mixing. This hack saved me on a Sunday when the kids demanded dessert at 5 p.m., and I didn’t have the luxury of a long‑standing room‑temperature butter.
The “Gold Standard” Glaze
Combine melted butter, honey, and a dash of orange zest for a glaze that sings. The citrus lifts the sweetness, creating a balanced finish that’s neither cloying nor bland. If you’re allergic to citrus, swap the zest for a pinch of ground cardamom for an exotic twist. This glaze has become my go‑to for impressing guests because it adds that glossy, professional look without any extra effort.
Creative Twists and Variations
This recipe is a playground. Here are some of my favorite ways to switch things up:
Berry Burst
Fold a cup of fresh mixed berries into the batter before baking. The berries release juices that create pockets of tangy surprise, perfect for summer gatherings. Serve with a dollop of whipped cream to counterbalance the tartness.
Nutty Crunch
Add a half‑cup of toasted chopped almonds or hazelnuts to the dry mix. The nuts toast during baking, providing a crunchy contrast to the soft interior. This variation is a hit with anyone who loves a bit of texture drama.
Spiced Autumn
Swap the espresso powder for a teaspoon of pumpkin spice and add a quarter cup of canned pumpkin puree. The result is a warm, autumn‑loving dessert that pairs beautifully with caramel sauce. Perfect for a cozy night in.
Chocolate‑Mint Delight
Replace half of the cocoa powder with white chocolate chips and add a few drops of peppermint extract. The mint cuts through the richness, creating a refreshing finish that feels like a holiday treat without the seasonal constraints.
Tropical Twist
Incorporate shredded coconut and a splash of coconut milk into the batter, then top with toasted coconut flakes after baking. The tropical aroma transports you to a beachside cabana, and the coconut’s natural sweetness reduces the need for extra sugar.
Storing and Bringing It Back to Life
Fridge Storage
Place the cooled dessert in an airtight container and store it in the refrigerator for up to three days. The moisture will stay locked in, keeping the crumb tender. Before serving, let it sit at room temperature for 15 minutes; this revives the texture and brings back the aromatic notes.
Freezer Friendly
Wrap individual slices tightly in parchment paper, then seal them in a freezer‑safe zip‑lock bag. They’ll last for up to two months. When you’re ready to enjoy, thaw overnight in the fridge, then reheat gently (see next section).
Best Reheating Method
Preheat your oven to 300°F (150°C). Place the slice on a baking sheet, add a tiny splash of water (about a teaspoon) around the edges, and cover loosely with foil. Heat for 8‑10 minutes; the steam will revive the interior while the foil prevents the top from over‑browning. The result is a dessert that tastes freshly baked, as if you never left it in the freezer.