I was staring at the pantry, feeling the weight of a kitchen crisis. My friend dared me to create a snack that would make her taste buds dance while my own cravings for sweet, crunchy comfort were screaming for something fresh. I grabbed my mixing bowl, a handful of mixed nuts, and a whisper of maple syrup, and the idea began to form like a storm brewing over a quiet lake. That moment, the kitchen smelled of toasted almonds and the faint scent of vanilla, and I knew I was onto something. By the end of the night, I had a recipe that was going to outshine every other sweet snack I've ever made.
Picture this: the sound of a wooden spoon clinking against a stainless steel bowl, the rhythmic sizzle of coconut oil in a hot pan, and the gentle hiss of maple syrup as it caramelizes. My senses were in a frenzy, and I could almost taste the golden crunch before it even hit the oven. I realized that the secret ingredient wasn't just the maple syrup; it was the way it bound the nuts together, creating a texture that was both chewy and brittle. This simple combination turns an ordinary snack into a festival of flavors that can be served at parties or savored alone in a quiet afternoon. I couldn't help but think, "This is hands down the best version you'll ever make at home."
Most recipes get this completely wrong by overmixing or underbaking, resulting in a mushy mess or a dry, brittle lump. I remember the first batch I tried; it came out soggy, and I was left with a bowl of regret. That failure taught me that precision matters, especially when working with nuts that have varying moisture content. The key is to toast them just enough to unlock their natural oils, then coat them with a thin glaze that caramelizes perfectly. This approach guarantees a crisp exterior that shatters like thin ice when you bite into it.
One technique that I didn't expect to be the game-changer is the use of a single tablespoon of coconut oil. It might sound like a tiny detail, but that oil adds a subtle tropical note and prevents the mixture from sticking to the pan, ensuring each bite is a clean, crunchy experience. The oil also helps the maple syrup spread evenly, creating a uniform glaze that gives the snack a glossy sheen. This small tweak is a masterstroke that elevates the snack from simple to sensational. If you've ever struggled with clumpy nuts, you're not alone—this fix is a lifesaver.
Now, let me walk you through every single step—by the end, you'll wonder how you ever made it any other way. I dare you to taste this and not go back for seconds because once you bite, the maple sweetness will cling to your tongue like a velvet scarf. The crunch will echo in your ears, and the warmth of the vanilla will linger long after the last bite. Picture yourself pulling this out of the oven, the whole kitchen smelling incredible, and seeing a golden batch that glistens like a sunrise. And trust me, the moment the first piece breaks, you'll hear that satisfying crack that says, "You're officially in snack heaven."
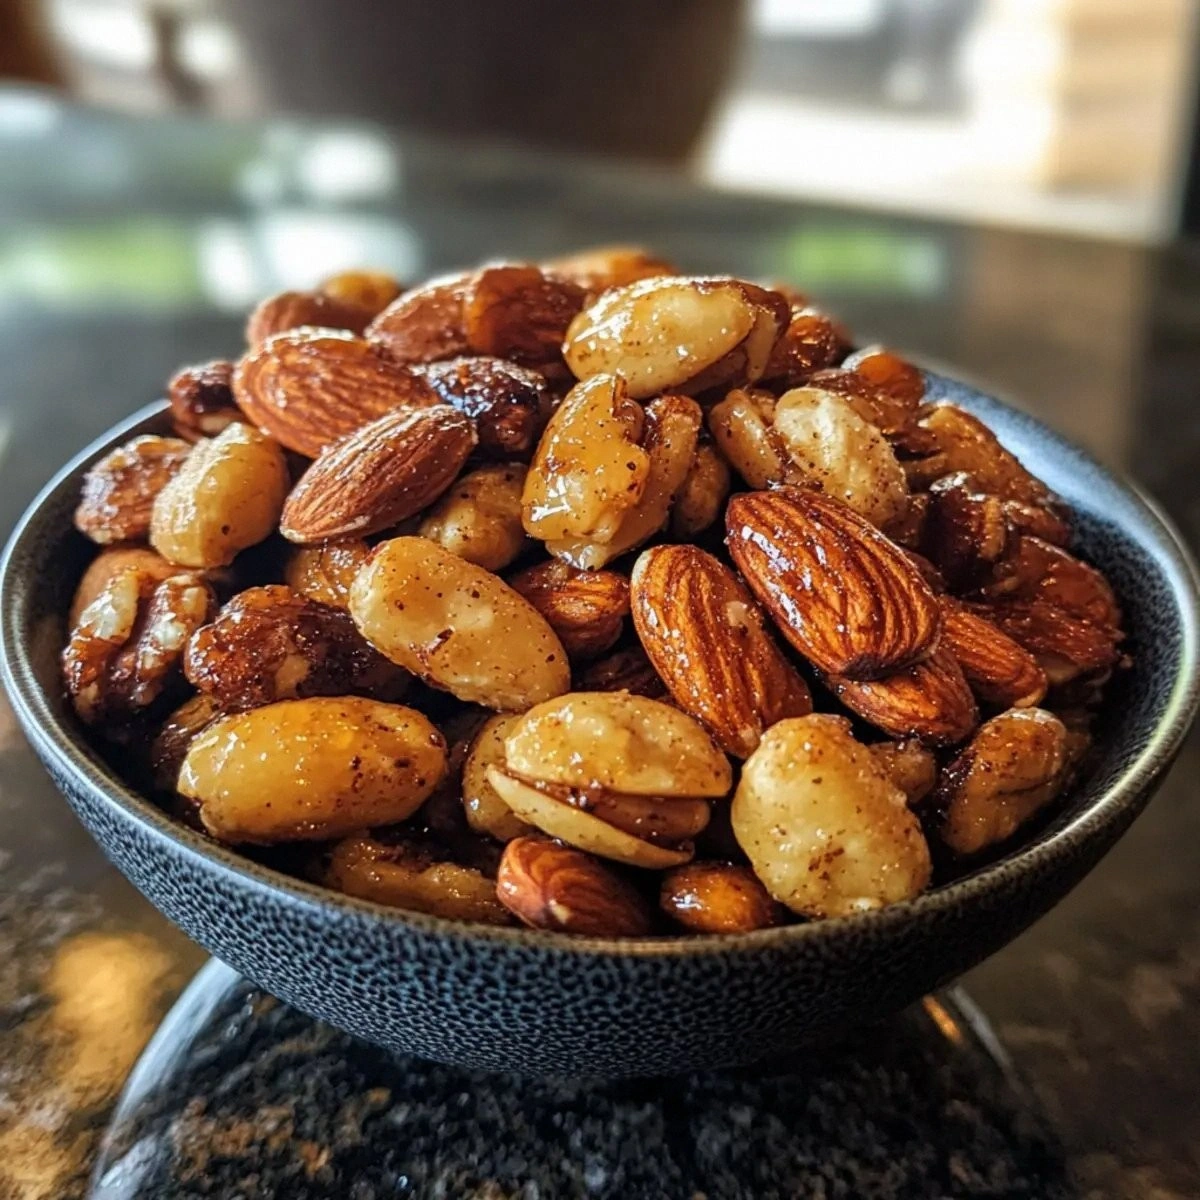
Before we dive into the recipe, let's talk about why this version stands out from every other version out there. It's not just about the ingredients; it's about the balance of flavors, the precise timing, and the attention to detail that turns a simple snack into a culinary masterpiece. The nuts provide a hearty base, the maple syrup offers a sweet, caramelized glaze, and the spices add depth and warmth. The coconut oil creates a smooth finish that keeps everything together without overpowering the natural nutty taste. And the final touch of vanilla adds a fragrant, almost floral note that completes the flavor profile.
I’ve experimented with countless variations, but this particular combination of nuts, maple, and spices is a match made in snack heaven. The crunchy texture is achieved through careful toasting, and the glaze locks in that satisfying snap. When you bite, the nuts pop like a confetti of flavors, and the maple syrup melts into a sweet, buttery coating. This is the kind of snack that can be served at a brunch, a movie night, or even as a quick breakfast on the go. It satisfies the sweet tooth without the guilt of a heavy dessert.
Finally, let’s set the stage for a recipe that feels like a secret weapon in your culinary arsenal. Whether you’re a seasoned cook or a kitchen rookie, this recipe is approachable, forgiving, and guaranteed to impress. You’ll learn how to combine simple pantry staples into a snack that feels luxurious and indulgent. So grab your apron, turn up the oven, and get ready for a flavor adventure that will have you shouting, “I can’t believe this is so simple!”
What Makes This Version Stand Out
- Taste: The maple syrup’s natural sweetness is amplified by the subtle warmth of cinnamon and vanilla, creating a flavor profile that feels both comforting and celebratory. The nuts provide a hearty, earthy backdrop that balances the syrup’s richness.
- Texture: The precise toasting of nuts combined with a thin glaze yields a crunch that fractures like thin ice, while the interior remains tender and chewy. This duality keeps each bite exciting.
- Simplicity: With only seven ingredients and a single pan, the recipe is lightning fast, making it ideal for last‑minute snack prep or a busy weekday.
- Unique Combination: The blend of mixed nuts and cashews offers varied flavors and textures, while coconut oil subtly lifts the glaze without overpowering the natural nutty undertones.
- Crowd‑pleaser: Whether you’re hosting a gathering or just feeding a craving, the snack’s glossy sheen and aromatic aroma instantly elevate the table.
- Ingredient Quality: Using fresh, high‑quality nuts and pure maple syrup ensures that each component shines on its own, contributing to a harmonious final product.
- Cooking Method: The technique of pre‑toasting, quick glazing, and controlled baking creates a snack that is both crisp and tender, avoiding the common pitfalls of over‑baking.
- Make‑ahead Potential: The snack stays fresh for up to a week in an airtight container, making it perfect for batch cooking and on‑the‑go snacking.
Alright, let’s break down exactly what goes into this masterpiece...
Inside the Ingredient List
The Flavor Base
The maple syrup is the heart of this snack, providing natural sweetness that caramelizes into a golden glaze. It’s essential to use pure maple syrup rather than a flavored or artificial sweetener; the subtle notes of caramel and caramelized sugar deepen the overall flavor. If you’re looking for a slightly different twist, a splash of bourbon or a pinch of sea salt can add complexity. Skipping the maple syrup would leave the nuts bland and dry, so it’s non‑negotiable. The syrup’s viscosity is crucial: too thin, and it won’t coat; too thick, and it clogs the pan.
When selecting maple syrup, look for a dark amber color and a robust aroma. Light syrup has a milder taste but can still work; however, it will produce a paler glaze. The syrup’s natural sugars also help to create the crispy edges, so don’t replace it with honey or agave unless you’re willing to experiment with different textures. The syrup’s role is not just sweetening; it’s binding the nuts into a cohesive, crunchy cluster.
The Texture Crew
Mixed nuts provide a dynamic bite, offering almonds for crunch, walnuts for richness, pecans for buttery notes, and hazelnuts for a slightly sweet undertone. Each nut type contributes its own flavor profile, creating a complex taste that feels like a party in your mouth. Cashews add a creamy texture that balances the crunch of the other nuts. Together, they form a harmonious blend that’s both satisfying and indulgent.
When you toast the nuts, aim for a uniform golden color; this ensures even caramelization and prevents burnt spots. If you prefer a softer crunch, you can reduce the toasting time slightly, but be careful not to undercook, or you’ll lose the desired snap. The nuts’ moisture content is a key factor: fresh nuts hold more moisture, which can result in a gummy texture if not toasted properly. Keep an eye on the heat and stir frequently to maintain even heat distribution.
The Unexpected Star
Coconut oil is the unsung hero that keeps the glaze from clumping and gives the snack a subtle tropical flavor. It also helps the maple syrup spread evenly across each nut, ensuring a glossy finish. Coconut oil’s high smoke point makes it ideal for quick sautéing without burning, and its neutral taste allows the maple and spices to shine. Using a small amount of coconut oil prevents the mixture from sticking to the pan and makes cleanup a breeze.
Some people prefer olive oil for a different flavor profile, but it can introduce a bitter note that clashes with the maple. If you’re avoiding dairy or coconut, a neutral oil like grapeseed or canola can work, though the taste will differ slightly. The oil’s role is both functional and flavor-enhancing; it’s a small ingredient that makes a big difference in the final product.
The Final Flourish
Ground cinnamon and vanilla extract are the finishing touches that elevate the snack from simple to unforgettable. Cinnamon adds warmth and a hint of spice, while vanilla brings depth and a fragrant aroma. Together, they create a flavor profile that feels comforting and sophisticated. The small quantities of these spices are enough to permeate the entire batch without overpowering the nuts or maple.
For those who love a bit of heat, a pinch of cayenne pepper can be added for a subtle kick. Alternatively, a dash of smoked paprika can give the snack a smoky undertone. The key is to balance the spices so that they complement rather than compete. A well‑measured blend ensures that every bite is a harmonious blend of sweet, nutty, and aromatic.
Everything’s prepped? Good. Let’s get into the real action…
The Method — Step by Step
- Preheat your oven to 350°F (175°C) and line a rimmed baking sheet with parchment paper. The parchment ensures the nuts don’t stick and makes cleanup effortless. While the oven warms, gather all the ingredients so you’re ready to move from prep to bake in a single flow. This step sets the foundation for a smooth process and prevents any last‑minute scrambling. The aroma of a preheated oven is the first hint that something delicious is about to happen.
- In a medium skillet, melt the tablespoon of coconut oil over medium heat until it glows slightly. Add the mixed nuts and toast them, stirring constantly, until they’re fragrant and just starting to brown. The nuts should release their oils and develop a nutty aroma that will carry through the rest of the recipe. Keep an eye on the heat; you want a golden color, not a burnt one. This step is critical for unlocking the nuts’ natural flavors.
- While the nuts toast, combine the maple syrup, ground cinnamon, vanilla extract, and sea salt in a small bowl. Whisk until the mixture is smooth and the spices are fully incorporated. This glaze will coat each nut, creating a glossy, caramelized finish. The salt balances the sweetness and brings out the depth of the maple. This is the moment where the flavors start to meld together.
- Pour the glaze over the toasted nuts and stir quickly to coat every piece. The mixture should sizzle softly as the maple syrup meets the hot nuts. Once coated, spread the mixture onto the prepared baking sheet in a single layer, ensuring no clumps. The even spread is essential for uniform baking and crispness. This step is the turning point where the snack transforms from raw to ready.
- Bake for 12–15 minutes, or until the nuts are golden and the glaze has set into a thin crust. Keep a close eye on the baking sheet; the glaze can darken quickly if left unattended. The goal is a light, caramelized sheen that gives the snack its signature shine. Once done, remove from the oven and let it cool on the sheet for a few minutes. This cooling period allows the glaze to firm up, creating that satisfying snap.
- Let the snack cool completely on the baking sheet. This final cooling step allows the glaze to set fully and the nuts to crisp. While cooling, you’ll notice the aroma intensifying, making the snack even more irresistible. Once cooled, break the clusters into bite-sized pieces or serve them whole, depending on your preference. The result is a snack that’s crisp, sweet, and utterly addictive.
- Transfer the cooled snack to an airtight container and store at room temperature for up to a week. For longer storage, refrigerate the snack, and it will stay crisp for up to two weeks. If you need to reheat, add a tiny splash of water to the container, seal, and microwave for 20–30 seconds; this steams the snack back to perfection. Enjoy it as a quick breakfast, a midday pick‑me‑up, or a delightful party treat.
That’s it — you did it. But hold on, I’ve got a few more tricks that will take this to another level…
Insider Tricks for Flawless Results
The Temperature Rule Nobody Follows
Many people bake at 400°F, thinking it’ll speed up the process. The truth is, a lower temperature of 350°F ensures even caramelization without burning the maple. It also helps the nuts release their oils gradually, which enhances the crunch. I once tried a higher temperature and ended up with a burnt exterior and a soggy interior. Stick to 350°F, and you’ll achieve that perfect, golden crust every time.
Why Your Nose Knows Best
When the nuts start to toast, you’ll notice a nutty aroma rising. Trust that scent; it’s the cue that the nuts are ready to move on. If you wait too long, the flavor will turn bitter, and the texture will suffer. The aroma is a natural indicator that the oils have been released and the nuts are primed for the glaze. It’s a simple, sensory check that eliminates guesswork.
The 5-Minute Rest That Changes Everything
After baking, let the snack rest on the sheet for five minutes before transferring. During this rest, the glaze sets and the nuts finish toasting slightly from residual heat. This short pause ensures maximum crispness and prevents the snack from sticking to the sheet when you move it. I’ve seen people skip this step, resulting in a slightly gummy texture. Trust me, that five‑minute rest is worth the wait.
Mixing the Glaze Quickly
When you pour the maple glaze over the nuts, stir immediately. The heat of the nuts will cause the syrup to thicken quickly, so a swift stir ensures an even coating. If you take too long, the glaze can settle at the bottom of the skillet, leading to uneven flavor. A quick, thorough mix guarantees that every nut gets its fair share of sweetness.
Cooling on the Sheet
Some chefs transfer the snack to a wire rack to cool. While that works, cooling on the sheet keeps the bottom crisp and allows the glaze to set in a single layer. It also makes it easier to break the clusters into bite‑sized pieces once they’re firm. I’ve found that the sheet method preserves the crunch better than a rack.
Reheating to Perfection
If you need to warm the snack, add a splash of water to the container before microwaving. The moisture steams the snack, restoring its crispness without making it soggy. Microwaving in short bursts, about 20–30 seconds, prevents overheating and ensures even reheating. This trick is especially handy for leftovers or for those who like their snack warm.
Creative Twists and Variations
This recipe is a playground. Here are some of my favorite ways to switch things up:
Spicy Maple Crunch
Add a pinch of cayenne pepper or a dash of smoked paprika to the glaze for a subtle heat that contrasts the sweet maple. The spice adds depth and makes the snack perfect for a game‑night snack. Serve it with a cool yogurt dip to balance the heat.
Almond Butter Swirl
Stir in a tablespoon of almond butter into the maple glaze before coating the nuts. This gives the snack a creamy, nutty undertone and a richer texture. It also adds extra protein, making it a more satisfying snack.
Chocolate Drizzle Finish
Once the snack has cooled, drizzle melted dark chocolate over the clusters. Let the chocolate set for a few minutes before serving. The bittersweet chocolate pairs beautifully with the maple and adds a decadent finish.
Herb‑Infused Sweetness
Infuse the maple glaze with fresh rosemary or thyme for an herbal twist. The herbs bring a savory note that balances the sweetness, creating a snack that’s both sweet and aromatic.
Nut-Free Version
Swap the nuts for toasted pumpkin seeds or sunflower seeds for a nut‑free alternative. The seeds provide a similar crunch and absorb the maple glaze wonderfully. This variation is great for those with nut allergies.
Storing and Bringing It Back to Life
Fridge Storage
Place the cooled snack in an airtight container and store it in the refrigerator for up to 5 days. The cold environment keeps the glaze from softening, preserving the crunch. When you’re ready to eat, let the snack sit at room temperature for a few minutes to regain its crispness.
Freezer Friendly
For longer storage, freeze the snack in a single layer on a parchment-lined tray before transferring it to a freezer bag. This prevents the snacks from sticking together. Freeze for up to 3 months, and it will stay crisp and flavorful. When you’re ready to eat, thaw at room temperature for 15 minutes.
Best Reheating Method
To revive the crunch, add a splash of water to the container, seal, and microwave on high for 20–30 seconds. The steam created will soften any stale glaze and restore the snack’s original texture. Alternatively, place the snack on a baking sheet and warm in a preheated oven at 300°F for 5 minutes.