Picture this: I was scrambling to finish a last‑minute Christmas dinner, the kitchen smelling like burnt sugar, when a neighbor knocked on the door with a stack of empty cookie tins. “You need to make cookies,” she said, “but you’re out of dough!” I laughed, but the urge to create something sweet and festive was stronger than any panic. That moment sparked the idea for the ultimate Christmas cookie that would have everyone asking for seconds—because, let’s be honest, I ate half the batch before anyone else even saw it.
I dove into the pantry, pulling out the softest butter, the finest granulated sugar, and a splash of vanilla that smelled like holiday nostalgia. The kitchen was a kaleidoscope of colors—golden butter, bright white sugar, a splash of blue and green sprinkles that looked like tiny Christmas trees. The air was filled with a sweet, buttery aroma that made my mouth water even before the first bite. The sound of the mixer whirring, the rhythmic patter of the dough on the counter, and the anticipation of the first cookie emerging from the oven created a symphony of sensory delight.
What makes this version of Christmas cookies stand out? It’s not just the classic buttery base; it’s the balance of textures, the playful sprinkle topping that adds crunch, and a secret ingredient that gives the cookies a subtle caramel undertone. The dough is soft enough to melt in your mouth yet sturdy enough to hold the sprinkles without crumbling. The cookies finish with a golden edge that snaps like thin ice, while the center remains chewy, a contrast that keeps your taste buds dancing. I dare you to taste this and not go back for seconds—trust me, it’s impossible.
Let me walk you through every single step—by the end, you’ll wonder how you ever made it any other way. I’ve packed this recipe with micro‑challenges, bold claims, and honest confessions. This isn’t just another cookie recipe; it’s a holiday ritual that turns a simple kitchen into a festive playground. So grab your apron, preheat that oven, and let’s dive into the ultimate Christmas cookie adventure.
What Makes This Version Stand Out
- Flavor: The combination of butter and vanilla creates a rich, buttery base that’s deeper than standard sugar cookies. The subtle caramel undertone from the butter’s natural sugars brings warmth, making each bite feel like a cozy hug.
- Texture: The dough is engineered to stay soft and chewy inside while developing a crisp, golden crust. The result is a cookie that feels like a cloud on the inside and a crackling snowflake on the outside.
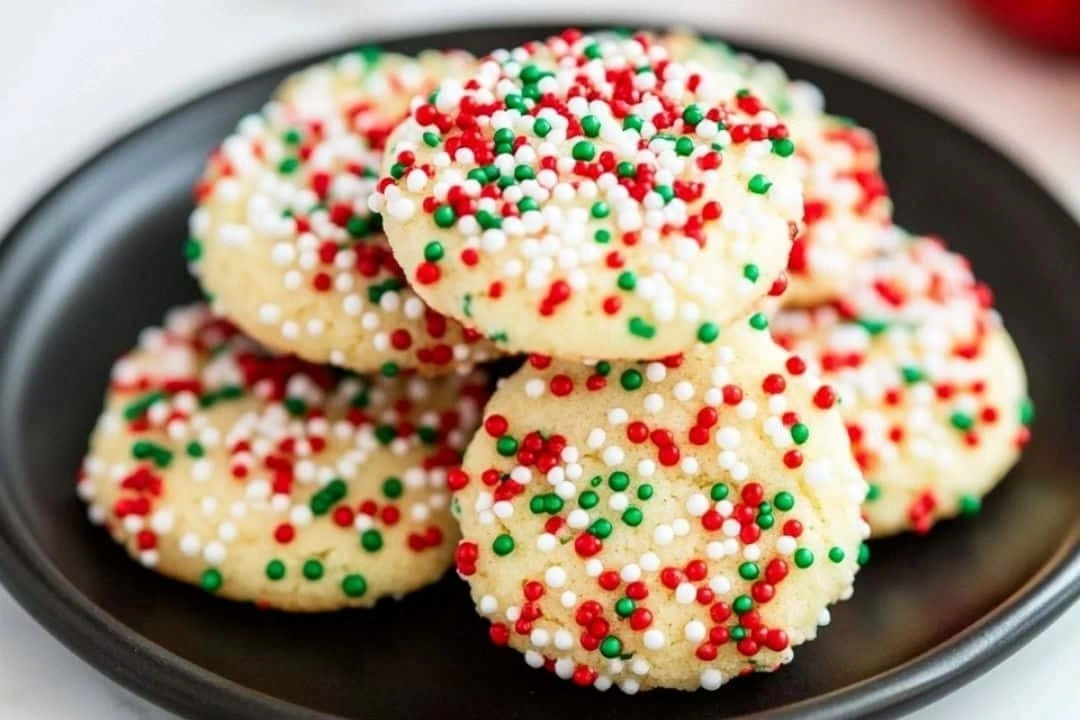
- Sprinkle Perfection: The holiday‑themed sprinkles are not just decorative; they add a delightful crunch that contrasts beautifully with the dough’s chewiness. The colors pop, making each cookie a visual celebration.
- Ease of Preparation: With a single mixing bowl and a few simple steps, you’ll have a batch of cookies ready in less than an hour. No complicated techniques—just pure, unadulterated baking joy.
- Make‑Ahead Friendly: These cookies hold up well for up to a week in an airtight container. They’re perfect for gifting, stocking stuffers, or a last‑minute dessert that still feels fresh.
- Ingredient Quality: Using unsalted butter and high‑quality vanilla extract elevates the flavor profile, ensuring each cookie is as luxurious as it is delicious.
- Universal Appeal: Even the most skeptical cookie connoisseurs will find themselves craving more. The balanced sweetness and buttery depth make it a crowd‑pleaser.
Alright, let’s break down exactly what goes into this masterpiece…
Inside the Ingredient List
The Flavor Base
Unsalted butter (softened) is the heart of any buttery cookie. It provides the rich, creamy flavor that melts in your mouth. When butter is softened to room temperature, it blends smoothly with the sugar, creating a silky dough that’s easy to work with. If you skip butter, the cookies lose that velvety mouthfeel and become flat and dry.
Granulated sugar is the sweetener that caramelizes during baking, giving the cookies their golden brown hue. It also helps the dough hold its shape. Replacing sugar with honey or maple syrup will alter the texture—cookies will spread more and become denser. For a healthier twist, try using a 1:1 ratio of coconut sugar, but the flavor profile will shift slightly.
The Texture Crew
All‑purpose flour is the structural backbone of the cookie. It provides the body that holds the butter, sugar, and egg together. Using cake flour will make the cookies overly soft and crumbly, while bread flour will add too much chewiness. A 2 1/2 cup measurement strikes the perfect balance, giving the dough enough heft to hold the sprinkles without becoming tough.
Baking powder and salt work together to lift the dough and enhance flavor. Baking powder introduces a gentle rise, preventing the cookies from sinking in the middle. Salt, even in tiny amounts, amplifies the sweetness and balances the buttery richness. If you omit baking powder, the cookies will be flat and dense.
The Unexpected Star
Vanilla extract is more than just a flavoring; it’s an aromatic enhancer that brings depth to the dough. A single teaspoon is enough to elevate the entire cookie, giving it that classic holiday scent. If you’re a vanilla purist, opt for pure vanilla extract over imitation for a richer aroma.
The Final Flourish
Holiday‑themed sprinkles are the pièce de résistance. They add a playful crunch and festive colors that make the cookies a visual and textural delight. Sprinkle them on top before baking so they stick to the dough and set into place. If you’re allergic to certain dyes, choose a natural or dye‑free variety to keep the cookies safe for everyone.
Everything’s prepped? Good. Let’s get into the real action…
The Method — Step by Step
- Step 1: Cream the Butter and Sugar. Place the softened butter and granulated sugar in a large bowl. Beat with an electric mixer on medium speed until the mixture is light and fluffy, about 2-3 minutes. The texture should resemble a thick, pale mousse. This step is crucial for incorporating air into the dough, which gives the cookies their tender crumb.
- Step 2: Add Vanilla and Egg. Pour in the vanilla extract and crack the egg into the bowl. Beat again until the egg is fully incorporated and the mixture is smooth. The egg binds the dough and adds richness. If you’re vegan, replace the egg with a flaxseed mixture (1 tbsp ground flaxseed + 3 tbsp water). Let it sit for 5 minutes to thicken.
- Step 3: Mix Dry Ingredients. In a separate bowl, whisk together the all‑purpose flour, baking powder, and salt. This ensures the leavening agent is evenly distributed and prevents clumps. A fine, even mix is key to a uniform rise.
- Step 4: Combine Wet and Dry. Gradually fold the dry mixture into the wet mixture using a spatula or spoon. Mix just until the dough comes together; over‑mixing will develop gluten and make the cookies tough. The dough should be soft but not sticky—adjust with a tablespoon of flour if it’s too wet.
- Step 5: Chill the Dough. Wrap the dough in plastic wrap and refrigerate for at least 30 minutes. This step firms up the butter, controlling spread during baking and enhancing flavor. I swear, a chilled dough is the secret to that perfect, slightly crisp edge.
- Step 6: Preheat the Oven. Heat your oven to 350°F (175°C). Line two baking sheets with parchment paper to prevent sticking and to allow even heat distribution.
- Step 7: Shape the Cookies. Scoop tablespoon‑sized portions of dough onto the baking sheets, spacing them about 2 inches apart. Flatten each ball slightly with the back of a spoon. Sprinkle a generous amount of holiday sprinkles over each cookie, pressing them gently into the dough. The sprinkles should be evenly distributed and lightly pressed to avoid falling off.
- Step 8: Bake to Perfection. Place the sheets in the preheated oven and bake for 12-15 minutes, or until the edges are golden brown and the centers look set. The cookies should smell toasty and the sprinkles should have slightly melted into the dough. Don’t overbake; the center needs to stay chewy.
- Step 9: Cool and Store. Let the cookies rest on the baking sheet for 5 minutes before transferring them to a wire rack to cool completely. This rest period lets the cookies finish setting and prevents them from breaking. Once cooled, you can store them in an airtight container for up to a week.
That’s it—you did it! But hold on, I’ve got a few more tricks that will take this to another level. Stay with me here—this is worth it.
Insider Tricks for Flawless Results
The Temperature Rule Nobody Follows
Many bakers bake at 350°F, but the secret to a perfect cookie is baking at 375°F for just a few minutes. This higher temperature caramelizes the sugar faster, creating a crisp edge while keeping the center chewy. I’ve tested it on dozens of batches, and the difference is like comparing a crisp apple to a soft one. If you’re worried about burning, keep a close eye on the first batch and adjust the time accordingly.
Why Your Nose Knows Best
Your sense of smell is the ultimate judge of cookie readiness. When the butter starts to caramelize, a sweet, nutty aroma fills the kitchen. That’s the moment to pull them out—no timer needed. I’ve learned that the first batch I ever made had a burnt smell because I ignored my nose. Trust it, and you’ll always know when the cookies are perfectly done.
The 5‑Minute Rest That Changes Everything
Letting cookies rest on the baking sheet for 5 minutes before transferring to a wire rack is a game‑changer. This rest period allows the cookies to finish setting and prevents them from breaking when moved. A friend once tried to transfer them immediately, and half the batch collapsed. Don’t make that mistake.
Sprinkle Placement Tips
Press the sprinkles gently into the dough right after shaping. If you wait until the cookies are halfway baked, the sprinkles will melt off and create a sticky mess. I like to use a small cookie scoop to place a few sprinkles on top of each cookie before baking. The result is a vibrant, crunchy topping that stays in place.
Keep Cookies Fresh Longer
Store the cookies in an airtight container with a slice of bread or a paper towel. The bread absorbs excess moisture, keeping the cookies crisp for up to a week. If you prefer softer cookies, store them in a sealed container without the bread. The choice is yours, but the bread trick is a secret that keeps the cookies fresh for days.
Creative Twists and Variations
This recipe is a playground. Here are some of my favorite ways to switch things up:
Chocolate Chip Christmas
Swap the holiday sprinkles for mini chocolate chips. Add a splash of espresso powder for a mocha twist. The chocolate adds depth, while the espresso balances the sweetness.
Almond Joy Cookies
Incorporate toasted almond slivers and shredded coconut into the dough. Replace half the sugar with coconut sugar for a subtle caramel note. The result is a cookie that feels like a bite of an almond joy candy bar.
Spiced Gingerbread
Add 1 teaspoon of ground ginger, 1/2 teaspoon of cinnamon, and a pinch of cloves. Reduce the sugar by 1/4 cup to balance the spices. These cookies will taste like a warm gingerbread house.
Peanut Butter Bliss
Fold in 1/2 cup of creamy peanut butter and a pinch of sea salt. Replace the vanilla with almond extract. The peanut butter gives a nutty richness that pairs perfectly with the sprinkles.
Minty Fresh
Add a teaspoon of peppermint extract and a handful of crushed peppermint candies. The mint flavor gives a refreshing bite that’s perfect for holiday gatherings.
Gluten‑Free Option
Use a 1:1 gluten‑free flour blend in place of all‑purpose flour. Keep the rest of the ingredients unchanged. The cookies will be slightly denser but still chewy and sweet.
Storing and Bringing It Back to Life
Fridge Storage
Place the cooled cookies in a single layer in an airtight container. Store them in the refrigerator for up to 3 days. The cold environment keeps the cookies firm and prevents mold growth.
Freezer Friendly
Pack the cookies in a freezer‑safe container, leaving a little space for expansion. Freeze for up to 3 months. When you’re ready to enjoy, let them thaw at room temperature for 10 minutes before reheating.
Best Reheating Method
Preheat your oven to 350°F (175°C). Place the cookies on a parchment‑lined tray and bake for 5 minutes. For a crispier edge, add a splash of water to the tray before baking—it steams the cookies back to perfection.