I was halfway through a midnight snack frenzy when my kitchen decided to throw a tantrum: the pancake batter had turned into a lumpy, soggy mess that refused to lift off the griddle. The air smelled faintly of burnt sugar, and I could hear the hiss of a pan that had never known a proper batter before. In that moment, I swear I heard my phone buzz with a friend’s dare: “Try something new, and if it’s good, share it.” That dare became my obsession, and what followed was a culinary revelation that still makes my taste buds do the cha‑cha every time I flip a stack.
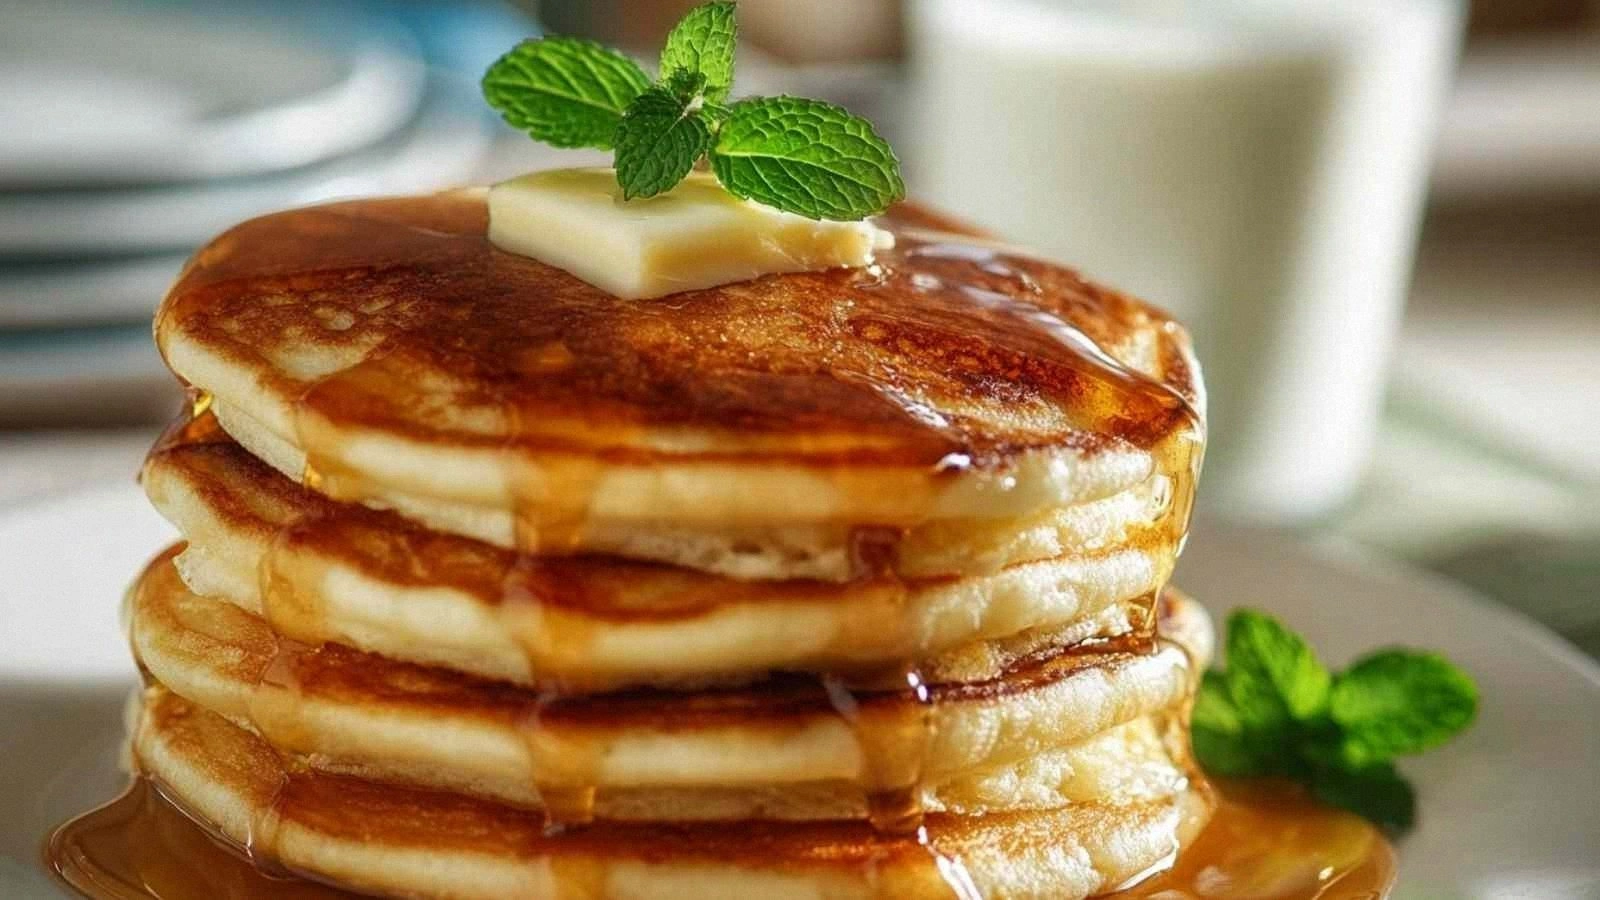
Picture this: a golden‑brown pancake that curls like a soft, buttery crescent, its edges crisped to a delicate crackle that shatters like thin ice when you bite into it. The aroma that rises from the skillet is a buttery, sweet, almost nutty scent, with a hint of vanilla that feels like a whisper of summer. When you take that first bite, the interior feels airy, almost like a cloud, yet the cottage cheese adds a subtle tang that lingers on the palate. The texture is a dance between fluffy and chewy, a harmony that makes you pause and savor each bite as if it were a rare gem.
This isn’t just another pancake recipe; it’s a full‑blown flavor symphony that turns a humble breakfast into a brunch‑worthy masterpiece. The combination of cottage cheese and almond flour gives it a protein punch that’s almost workout‑ready, while the almond flour keeps the batter low‑carb and gluten‑free without sacrificing mouthfeel. The secret lies in the balance of moisture and leavening: a single teaspoon of baking powder lifts the batter, while the cottage cheese’s natural whey creates that airy lift that you see in a well‑made souffle. I dare you to taste this and not go back for seconds—once you do, you’ll never settle for ordinary pancakes again.
Let me walk you through every single step—by the end, you’ll wonder how you ever made pancakes any other way. The process is simple enough to be a confidence booster for beginner cooks, yet it’s packed with tricks that even seasoned chefs will appreciate. From the first whisk to the last flip, each moment is a chance to refine your technique, and the final result is a stack that looks as good as it tastes. So grab your skillet, and let’s dive into this game‑changer that will forever change your breakfast routine.
What Makes This Version Stand Out
- Flavor: The cottage cheese brings a subtle tang that balances the sweetness, creating a depth that classic pancakes simply can’t match. This nuance turns each bite into a surprise, keeping your palate engaged.
- Texture: Almond flour provides a light, slightly nutty crumb, while the eggs bind everything into a tender yet sturdy structure that doesn’t crumble under a fork.
- Nutrition: With a protein count that rivals a post‑workout shake, this recipe is a powerhouse for muscle recovery while still being low in carbs and gluten‑free.
- Speed: From prep to plate, the entire process takes less than twenty minutes, making it an ideal choice for busy mornings or spontaneous brunches.
- Versatility: Swap the sweetener for a pinch of sea salt or add berries for a savory twist—this base adapts to whatever mood you’re in.
- Crowd‑Pleaser: The fluffy interior paired with crisp edges creates a visual and sensory experience that even picky eaters love, making it perfect for family gatherings.
Alright, let's break down exactly what goes into this masterpiece. The ingredients are simple, the technique is straightforward, and the results are unforgettable.
Inside the Ingredient List
The Flavor Base
Cottage cheese is the star that gives this pancake its signature tang and moisture. It’s a dairy product that’s high in protein and low in fat, making it a smart choice for anyone watching their macros. When blended, the curds break down into a silky texture that coats the batter like velvet. Skipping it would result in a bland, dry pancake that feels more like a cracker than a cake.
If you’re lactose intolerant or simply prefer a dairy alternative, Greek yogurt can be a suitable swap. It has a similar consistency and protein profile, though it may introduce a slightly thicker batter. Just be sure to whisk it thoroughly to avoid any clumps that could affect the final crumb.
The Texture Crew
Almond flour is the unsung hero that keeps the batter light yet gives it a subtle nutty flavor. Unlike all-purpose flour, almond flour has no gluten, which means the pancakes won’t be too chewy or tough. The fine texture ensures a smooth batter that spreads evenly on the pan. If you can’t find almond flour, you can blend blanched almonds into a fine powder, but make sure to sift it to avoid grit.
The eggs act as the binder that holds everything together. They also provide the structure needed for the pancakes to rise slightly during cooking. If you’re vegan, a flaxseed “egg” (1 tablespoon ground flaxseed mixed with 3 tablespoons water, left to sit for 5 minutes) can replace a single egg, but you’ll need to add an extra egg to maintain the ratio.
The Unexpected Star
Baking powder is the leavening agent that gives the pancakes their airy lift. Even a single teaspoon can make a noticeable difference in volume, preventing the batter from collapsing. If you’re avoiding processed ingredients, you can use a combination of baking soda and an acid (like a splash of lemon juice) to achieve the same effect.
Vanilla extract, though small in quantity, adds a fragrant warmth that ties the flavors together. It’s a classic addition to sweet pancakes, but its subtlety means you can skip it if you’re short on time. Just remember that the vanilla’s aroma can transform a good pancake into a great one.
The Final Flourish
The sweetener of choice is a personal decision—whether you opt for sugar, honey, maple syrup, or a low‑calorie alternative, it’s the final touch that balances the tang of cottage cheese. A tablespoon of sweetener is enough to bring harmony without overpowering the other flavors. If you prefer a sugar‑free version, consider stevia or monk fruit, but keep in mind that these can alter the batter’s consistency slightly.
Butter or oil is the last ingredient that brings everything together during cooking. It prevents sticking, adds flavor, and gives the pancakes that golden‑brown finish. A tablespoon of butter is sufficient for a medium‑sized skillet, but if you’re cooking in batches, you may need a bit more to keep the pan from drying out.
Everything’s prepped? Good. Let’s get into the real action.
The Method — Step by Step
- Step 1: Blend the Wet Ingredients. In a medium bowl, whisk together the cottage cheese, eggs, vanilla extract, and sweetener until the mixture is smooth and free of lumps. The goal is a velvety base that will carry the flour evenly. This step might feel like you’re making a custard, but trust me, it’s the foundation of the pancake’s lightness. If you notice any clumps, give it a quick pulse with a hand mixer.
- Step 2: Combine Dry Ingredients. In a separate bowl, whisk together almond flour, baking powder, and a pinch of salt. The salt is essential for flavor balance, but be careful not to overdo it—too much can make the pancakes taste metallic. Stir the dry mix until it’s well combined, ensuring even distribution of leavening agents.
- Step 3: Mix Wet and Dry. Gently fold the dry mixture into the wet batter, stirring until just combined. Over‑mixing can lead to a dense texture, so stop as soon as you see no visible flour streaks. The batter should be thick but pourable, like a thick pancake batter you’d see in a bakery.
- Step 4: Preheat the Pan. Heat a non‑stick skillet over medium heat and add a tablespoon of butter or oil. Once the butter melts and starts to foam, you’re ready to pour. The pan should be hot but not smoking; a drop of water should sizzle and evaporate immediately.
- Step 5: Pour the Batter. Use a 1/4‑cup measure to drop batter onto the skillet, spacing each pancake about 2 inches apart. The batter will spread slightly, forming a round disk. If the batter is too runny, it will spread too much and result in thin pancakes.
- Step 6: Cook the First Side. Let the pancake cook for 2–3 minutes, or until you see bubbles forming on the surface and the edges start to lift. The sizzle you hear is the batter’s moisture turning to steam. If the edges look too brown, reduce the heat slightly to allow the inside to set.
- Step 7: Flip and Cook the Second Side. Gently flip the pancake with a spatula and cook for another 1–2 minutes. The second side should be golden and slightly crisp, with a subtle buttery aroma. The flip is a moment of truth—watch the pancake rise a little as it cooks.
- Step 8: Repeat. Continue the process with the remaining batter, adjusting heat as necessary. Keep the pancakes warm in a low‑heat oven (200°F) while you finish the batch.
- Step 9: Serve. Stack the pancakes on a plate, drizzle with maple syrup, a dollop of yogurt, or a sprinkle of fresh berries. The final touch is the visual appeal: a stack of golden, fluffy pancakes that look as good as they taste.
- Step 10: Enjoy. Take a bite, savor the airy interior, the buttery exterior, and the subtle tang from the cottage cheese. The first bite should feel like a hug from a warm blanket—comforting, satisfying, and utterly delicious.
That's it—you did it. But hold on, I've got a few more tricks that'll take this to another level.
Insider Tricks for Flawless Results
The Temperature Rule Nobody Follows
Many cooks think “high heat is always better,” but that’s a myth. A moderate heat of 350°F (175°C) is ideal for these pancakes, allowing the batter to cook through without burning the exterior. If you notice the pancakes browning too quickly, lower the heat by a few degrees. Remember, the goal is a golden crust and a fluffy interior, not a charred surface.
Why Your Nose Knows Best
Before flipping, pause and sniff the pancake. A pleasant, buttery aroma indicates that the interior is set. If the smell is sour or off, it’s a sign the batter needs more time. Your nose is a reliable indicator of doneness—trust it, and you’ll avoid the dreaded “burnt outside, raw inside” disaster.
The 5-Minute Rest That Changes Everything
After cooking, let the pancakes rest on a wire rack for 5 minutes before serving. This brief pause allows the steam to redistribute, ensuring the interior stays moist while the crust remains crisp. Skipping this step can result in a dry, crumbly texture that feels more like a biscuit than a pancake.
Use a Non‑Stick Skillet
A high‑quality non‑stick skillet is a game‑changer. It reduces the need for excessive butter or oil, which can make pancakes greasy. If you’re using a cast‑iron pan, preheat it well and use a thin layer of oil to prevent sticking. The difference in texture will be noticeable.
Don’t Skimp on the Butter
The butter not only prevents sticking but also adds depth of flavor. Use a good quality unsalted butter for the best results. If you’re vegan, a high‑quality coconut oil can be a suitable alternative, but keep in mind it may impart a coconut flavor.
Keep the Batter Covered
If you’re making a large batch, cover the batter with plastic wrap while it rests. This prevents the surface from drying out and forming a skin. It also keeps the batter from absorbing any odors from the fridge.
Creative Twists and Variations
This recipe is a playground. Here are some of my favorite ways to switch things up:
Berry Burst
Fold fresh blueberries or strawberries into the batter before cooking. The fruit bursts with juice during the first few minutes, creating a natural glaze that pairs perfectly with a drizzle of honey. This variation is a must‑try for summer mornings.
Chocolate Chip Delight
Add a handful of dark chocolate chips to the batter for a decadent treat. The chocolate melts slightly, creating pockets of molten goodness. Serve with a dusting of powdered sugar for an Instagram‑worthy finish.
Savory Spin
Replace the sweetener with a pinch of smoked paprika and a sprinkle of fresh herbs like chives or dill. Top with a slice of smoked salmon and a dollop of Greek yogurt for a savory twist that’s perfect for brunch.
Nutty Crunch
Mix in chopped walnuts or pecans into the batter. The nuts add a delightful crunch and a nutty aroma that complements the almond flour. Toast the nuts beforehand to enhance their flavor.
Spiced Cinnamon
Add 1 teaspoon of ground cinnamon to the dry mix. The warm spice elevates the flavor profile, making the pancakes feel cozy and comforting. A dash of nutmeg can add an extra layer of complexity.
Protein Power
Boost the protein content by adding a scoop of vanilla whey protein powder to the batter. This is ideal for post‑workout breakfasts or for those looking to increase their daily protein intake without compromising taste.
Storing and Bringing It Back to Life
Fridge Storage
Store leftovers in an airtight container in the refrigerator for up to 3 days. The pancakes will remain moist and flavorful, thanks to the cottage cheese’s natural moisture retention. Avoid stacking them directly; place a parchment paper sheet between each layer to keep them from sticking.
Freezer Friendly
Freeze pancakes in a single layer on a parchment‑lined tray for up to 2 months. Once frozen, transfer them to a resealable bag for longer storage. When ready to eat, pop a stack onto a sheet of parchment and toast them in a skillet for 2 minutes on each side.
Best Reheating Method
The secret to reheat them without drying out is to add a splash of water or milk before microwaving. Cover the stack with a damp paper towel and heat on medium power for 30 seconds. The steam will restore the pancakes’ fluffy interior.