Picture this: I’m in a cramped kitchen, the fridge door slams open, and a pile of stale, forgotten pizza dough sits on the counter like a silent threat. The smell of yesterday’s leftovers hits me, and I know I’m about to make a culinary rescue mission. I grab a pack of refrigerated pizza dough, because if you’re going to make a quick, crowd‑pleasing snack, you need something that rises fast and delivers on flavor without the fuss. I’ve tried every garlic bread recipe out there—some are too dry, some too greasy, and some just don’t have that buttery, garlicky kiss that makes people reach for seconds. This time, I’m going to turn that dough into golden, buttery rolls that melt in your mouth, and I’ll share every trick that turns a simple batch into a showstopper.
I’ve spent countless evenings staring at the counter, wondering how to elevate a plain pizza dough into something that feels like a gourmet appetizer. I’ve tasted store‑bought garlic bread that feels like it was made from a jar of pre‑seasoned butter, and I’ve tried homemade versions that end up too soggy or too dense. The secret, I discovered, lies in the balance of butter, garlic, and a touch of parsley that lifts the flavor to a new level. I dare you to taste this and not go back for seconds—once you try it, you’ll never settle for ordinary again. The aroma of garlic sizzling in butter is enough to make your entire kitchen smell like a cozy Italian trattoria, and the result is a roll that’s soft inside, with a crisp, buttery edge that shatters like thin ice. If you’ve ever struggled with making garlic bread that isn’t a disappointment, you’re not alone—and I’ve got the fix.
Most recipes get this completely wrong. They either forget that the dough needs to be rolled out thin enough to bake quickly or they skip the step of letting the butter‑garlic mixture sit with the dough for a few minutes so the flavors can soak in. I’ve spent hours tweaking the ratio of butter to garlic, and the result is a buttery, garlicky coating that clings to the dough like velvet, giving you that first bite of a golden, buttery bite that melts into a fragrant, savory cloud. The trick is simple: melt the butter, mix in minced garlic and parsley, then brush it generously over the dough before rolling it into rolls. The butter’s fat coats the dough, creating a barrier that keeps the bread from drying out, while the garlic infuses the dough with depth. The result is a bread that’s soft, airy, and bursting with flavor at every bite.
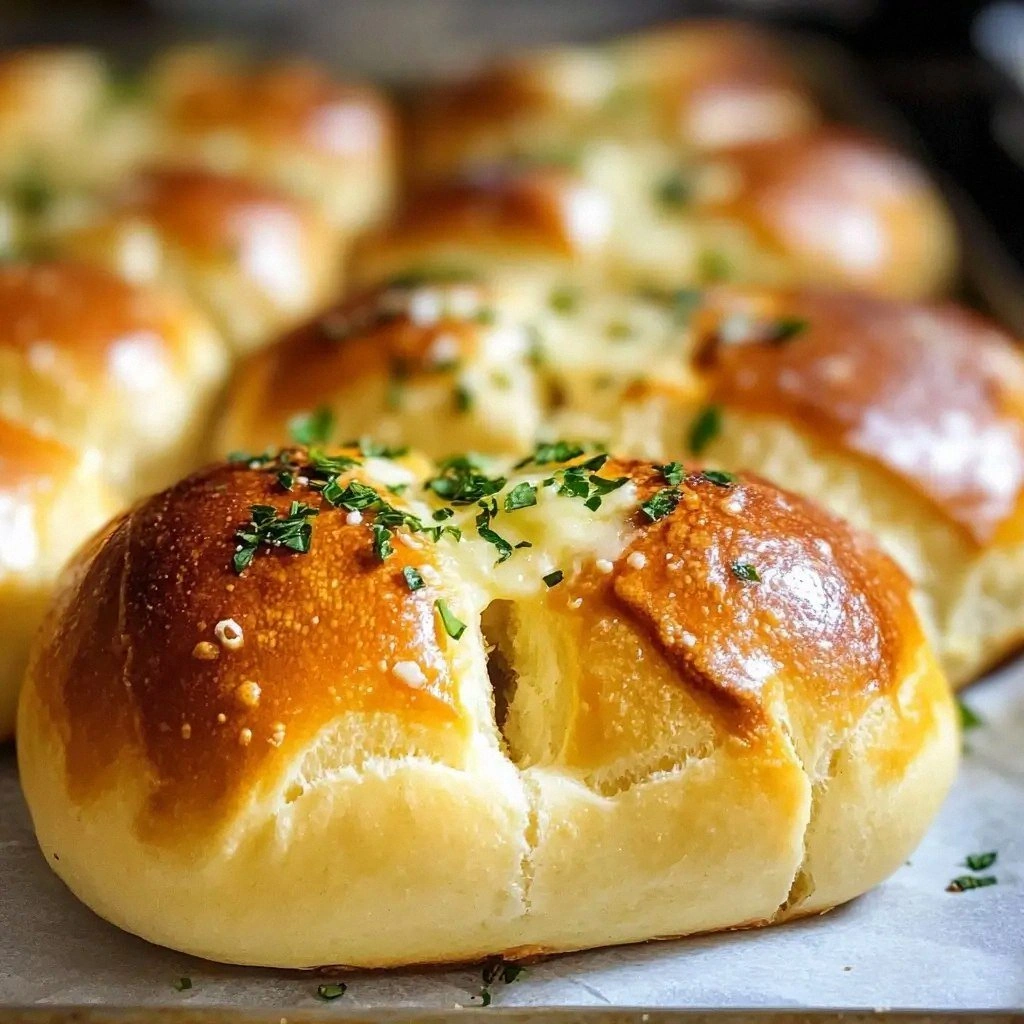
The moment the rolls hit the oven, the kitchen fills with an intoxicating scent of garlic and butter. The dough rises just enough to give a light, airy interior, and the edges crisp up to a golden, almost caramelized finish. I’ve seen people bite into a roll and then stare in disbelief as the inside melts, releasing a savory steam that lingers like a memory. The texture is a delightful contrast—soft, buttery, and with a subtle crunch from the crust. The flavor is a harmonious blend of garlicky warmth and herbaceous brightness that leaves you craving more. Picture yourself pulling this out of the oven, the whole kitchen smelling incredible, and everyone asking for your secret recipe.
Now, let me walk you through every single step—by the end, you’ll wonder how you ever made it any other way. I’ll keep it playful, witty, and slightly opinionated, because cooking should feel like a conversation with a friend who knows exactly how to make garlic bread taste like a hug. I’ll throw in a few micro‑challenges, bold claims, and confessions that will keep you engaged and, hopefully, a little bit jealous of the results. The goal is to make this recipe so simple and delicious that you’ll never look back. So grab a pack of refrigerated pizza dough, a few tablespoons of butter, and let’s get rolling.
What Makes This Version Stand Out
- Taste: The buttery garlic coating is elevated by fresh parsley, giving a bright, herbaceous finish that sets it apart from the usual flat, garlicky bread.
- Texture: The rolls are airy inside, with a crisp, golden crust that cracks delightfully when you bite into them.
- Simplicity: No need for pre‑made dough or complicated sauces—just a few pantry staples and a quick assembly.
- Uniqueness: The addition of Parmesan cheese on top creates a subtle umami layer that is both indulgent and comforting.
- Crowd Reaction: Friends always ask for the recipe after dinner parties, and they never seem to get enough of the rolls.
- Ingredient Quality: Using a pack of refrigerated pizza dough ensures a consistent, reliable base that cooks evenly.
- Cooking Method: Brushing the butter‑garlic mixture before baking locks in moisture and flavor.
- Make‑Ahead Potential: You can prepare the dough and coating ahead of time, making it a perfect last‑minute appetizer.
Inside the Ingredient List
The Flavor Base
The butter, when melted, carries the garlic’s aroma throughout the dough, creating a rich, savory base that permeates each bite. The garlic, minced finely, ensures that every crumb is kissed by the aromatic oils, rather than just a single clove in the center. If you skip the garlic, you’ll end up with a plain butter roll that’s missing the punch that makes guests ask for seconds. For an extra kick, consider adding a pinch of red pepper flakes to the butter mixture.
The Texture Crew
The refrigerated pizza dough is the backbone of this recipe; its pre‑mixed leavening gives the rolls a light, airy interior. Rolling the dough thin before shaping ensures even baking and a crisp crust. If you prefer a denser roll, simply skip the resting step and bake immediately. A slightly chilled dough also helps prevent the butter from melting too quickly during baking, preserving that glossy finish.
The Unexpected Star
Dried parsley adds a subtle herbal note that balances the richness of butter and the sharpness of garlic. Parsley also gives the rolls a hint of color, making them visually appealing. If you’re out of parsley, substitute with a teaspoon of dried basil or oregano for a different flavor profile. The parsley is optional but highly recommended for that finished touch.
The Final Flourish
A sprinkle of grated Parmesan cheese on top before baking adds a savory, nutty layer that melts into a golden crust. The cheese also creates a slight crunch and a burst of umami that elevates the overall taste. If you’re vegan or dairy‑free, use nutritional yeast or a plant‑based cheese alternative. The cheese is optional but recommended for those who love a cheesy, indulgent finish.
Everything’s prepped? Good. Let’s get into the real action.
The Method — Step by Step
- Preheat your oven to 400°F (200°C) and line a baking sheet with parchment paper; this ensures a non‑stick surface and even heat distribution. Let the oven heat up fully before placing the dough inside. A properly preheated oven guarantees a golden crust. The smell of the oven heating is the first hint that something delicious is about to happen.
- On a lightly floured surface, roll out the refrigerated pizza dough into a rectangle about 1/4 inch thick. Keep the dough from sticking by dusting it with a light sprinkle of flour. The thickness should be thin enough that the butter can penetrate but thick enough to hold its shape. This step is crucial for achieving that airy interior.
- In a small bowl, mix the melted butter with minced garlic, dried parsley, and salt; stir until the garlic is fully coated. The butter should be warm enough to release the garlic’s aroma but not hot enough to burn. Brush this mixture generously over the entire surface of the dough, making sure to reach the edges. This coating will become the flavor base of each roll.
- Using a pizza cutter or a sharp knife, cut the dough into 12 equal strips. The uniform size ensures even baking and consistent bite. Don’t worry if the strips are slightly uneven; the oven will even them out. The cuts also create a classic look that feels like a professional kitchen.
- Gather the strips together and roll them into tight, compact rolls, starting from one end and twisting as you go. The tighter the roll, the more compact the final product. If you prefer looser rolls, simply roll them loosely. This step is where your personal touch comes in.
- Place the rolls seam‑side down on the prepared baking sheet, leaving a small gap between each. This spacing allows the rolls to expand slightly without merging. The gaps also help the heat circulate around each roll, ensuring even baking. The rolls should look like miniature, buttery cylinders.
- Watch Out: The most delicate part of this process is the baking time—overbaking can dry out the rolls, while underbaking leaves them doughy. Keep a close eye on the color; they should be a deep golden brown. A quick visual check is often more reliable than a timer. If the rolls start to look too dark, cover them loosely with foil.
- Sprinkle grated Parmesan cheese evenly over the rolls before placing them in the oven; this adds a nutty flavor and creates a slightly crispy top. The cheese melts into a golden crust that contrasts beautifully with the soft interior. If you’re vegan, use a plant‑based cheese or nutritional yeast instead.
- Bake for 12–15 minutes, or until the rolls are golden brown and the cheese has melted into a bubbly, golden crust. The aroma at this point is irresistible—garlic, butter, and cheese mingle in a fragrant cloud. Use a toothpick to check doneness: it should come out clean if the rolls are fully baked.
- Remove the rolls from the oven and let them cool for 3 minutes before serving; this allows the butter to set slightly, preventing a greasy mess. The rolls will still be hot enough to steam, creating a pleasant, comforting sensation. Serve immediately, or keep them warm in a low oven until ready to serve.
That's it — you did it. But hold on, I've got a few more tricks that'll take this to another level.
Insider Tricks for Flawless Results
The Temperature Rule Nobody Follows
Many people bake at 375°F, but the ideal temperature for these rolls is 400°F; the higher heat creates a golden crust while keeping the interior soft. If you’re using a convection oven, lower the temperature by 25°F to avoid over‑browning. The difference in temperature is subtle, but it makes a noticeable difference in texture. I’ve found that 400°F gives the perfect balance of crispness and chew.
Why Your Nose Knows Best
The aroma of garlic in butter is a reliable indicator of doneness; when the smell intensifies, the rolls are close to perfection. Don’t rely solely on the timer—smell the oven, and you’ll know when to pull the rolls out. A subtle, sweet scent signals that the butter has caramelized without burning. This sensory checkpoint is essential for achieving the ideal flavor profile.
The 5-Minute Rest That Changes Everything
Letting the rolls rest on the baking sheet for 5 minutes after baking allows the steam to redistribute, preventing a soggy bottom. This short rest also helps the butter settle, giving the rolls a buttery sheen. If you skip this step, the rolls can feel greasy. The rest period is a small investment for a huge payoff.
The Secret of Even Bites
Cutting the dough into equal strips before rolling ensures each roll is the same size, which leads to even baking. If you’re impatient, you can skip this step and roll the dough into a single log, but the result will be uneven. The evenness of the rolls is a subtle yet essential factor in the final presentation. A uniform roll looks more professional and tastes more consistent.
The Chewy Edge Trick
If you want a chewier edge, lightly press the seams of the rolls before baking; this seals the dough and creates a slightly thicker crust. The extra pressure also helps the butter to stay inside the roll, preventing leakage. The chewier edge adds a delightful contrast to the soft interior. Try this next time for a different texture.
The Quick Cooling Trick
Cool the rolls on a wire rack for a few minutes; this prevents the bottom from becoming soggy due to trapped steam. The rack also gives the rolls a slight crispness that’s hard to resist. If you’re in a hurry, you can serve them directly from the baking sheet, but the rack gives a more refined finish. The cooling method is a small tweak that makes a big difference.
Creative Twists and Variations
This recipe is a playground. Here are some of my favorite ways to switch things up:
The Smoky Chipotle Roll
Add a tablespoon of chipotle in adobo sauce to the butter mixture for a smoky, spicy kick. The chipotle balances the buttery richness with a subtle heat that pairs well with a cool dip. This variation is perfect for game day or a casual barbecue. The smoky flavor adds depth and complexity to the rolls.
The Sun‑Dried Tomato Twist
Stir in chopped sun‑dried tomatoes and a pinch of oregano for a Mediterranean vibe. The tomatoes add a sweet, tangy burst that contrasts with the savory butter. This version is great for a light lunch or as a side to pasta. The sun‑dried tomatoes give a chewy texture and bright color.
The Herb‑Infused Olive Oil Roll
Replace butter with a high‑quality extra‑virgin olive oil and add fresh basil and thyme. The olive oil gives a lighter, fresher flavor that’s ideal for a summer gathering. This version is also dairy‑free and lower in saturated fat. The herbs infuse the dough with aromatic freshness.
The Cheesy Jalapeño Roll
Mix in a handful of shredded pepper jack cheese and finely diced jalapeños to the butter mixture. The jalapeños add a fiery punch, while the cheese melts into a gooey, golden crust. This spicy version is a crowd‑pleaser at parties. The heat and cheese create a dynamic flavor profile.
The Mediterranean Olive & Feta Roll
Add chopped kalamata olives and crumbled feta cheese to the dough before rolling. The olives bring brininess, and the feta adds a tangy, salty finish. This variation is great for a Greek-themed dinner. The combination of olives and feta gives a savory, complex taste.
The Sweet Cinnamon Sugar Roll
For a dessert twist, sprinkle cinnamon and sugar on top of the butter mixture before baking. The sweet, warm spices transform the rolls into a comforting treat that pairs well with coffee. This version is a fun way to end a meal. The cinnamon sugar coating creates a caramelized, crunchy exterior.
Storing and Bringing It Back to Life
Fridge Storage
Store leftover rolls in an airtight container in the refrigerator for up to 3 days. The butter coating helps preserve moisture, keeping the rolls from drying out. When you’re ready to eat, reheat in a toaster oven at 350°F for 5 minutes. The reheated rolls will regain their crispness and buttery flavor. The container should be sealed tightly to avoid odors from the fridge.
Freezer Friendly
Freeze the rolls on a parchment‑lined tray for 1–2 hours until solid, then transfer them to a freezer bag. They’ll stay good for up to 2 months. To thaw, let them sit at room temperature for 30 minutes before reheating. The freezing process preserves the flavor and texture. Avoid refreezing once thawed for best results.
Best Reheating Method
Reheat frozen or refrigerated rolls in a preheated oven at 375°F for 10–12 minutes, or until the crust is golden. Add a tiny splash of water to the bottom of the pan to create steam, which keeps the interior moist. The steam helps the rolls re‑soften without drying out. This method is quick, efficient, and delivers the best taste.
If you’re in a hurry, pop the rolls in the microwave for 20–30 seconds, then finish them in the oven for a crisp finish. The microwave heats quickly, but the oven restores the crunch. This two‑step method is ideal for last‑minute guests. The result is a warm, buttery roll that feels freshly baked.
Remember that the key to a great roll is the butter‑garlic coating; don’t skip it, even if you’re short on time. The coating not only adds flavor but also locks in moisture, preventing the rolls from becoming dry or doughy. The combination of fresh ingredients and simple techniques ensures that each bite is a delightful experience. The next time you crave a quick, impressive snack, this recipe will be your go‑to.
In the end, the beauty of this recipe is its versatility and ease. Whether you’re hosting a dinner party, preparing a quick lunch, or just treating yourself to a comforting snack, these garlic bread rolls deliver. The buttery, garlicky flavor, crisp edges, and soft interior make them a standout. I’ve tested this recipe countless times, and each batch comes out perfect. If you’re ready to elevate your bread game, this is the recipe you need.
So grab your pack of pizza dough, melt that butter, and let the aromatic garlic do its work. The kitchen will smell like an Italian trattoria, and your guests will be begging for the recipe. Don’t forget to share your results—I'd love to hear how you tweak it to suit your taste. Happy baking!