I was halfway through a weeknight dinner, juggling a simmering pot of tomato sauce and a pot of rice, when the kitchen turned into a smoky battlefield. The chicken I had tossed into a skillet had burned on the bottom, leaving a blackened crust that clung to the pan like a stubborn scar. I stared at the charred remains, heart racing, and thought, “This is how it ends?” The next moment, I grabbed a handful of honey, garlic, and soy sauce from my pantry, and the aroma that filled the room was a promise that something extraordinary was about to happen.
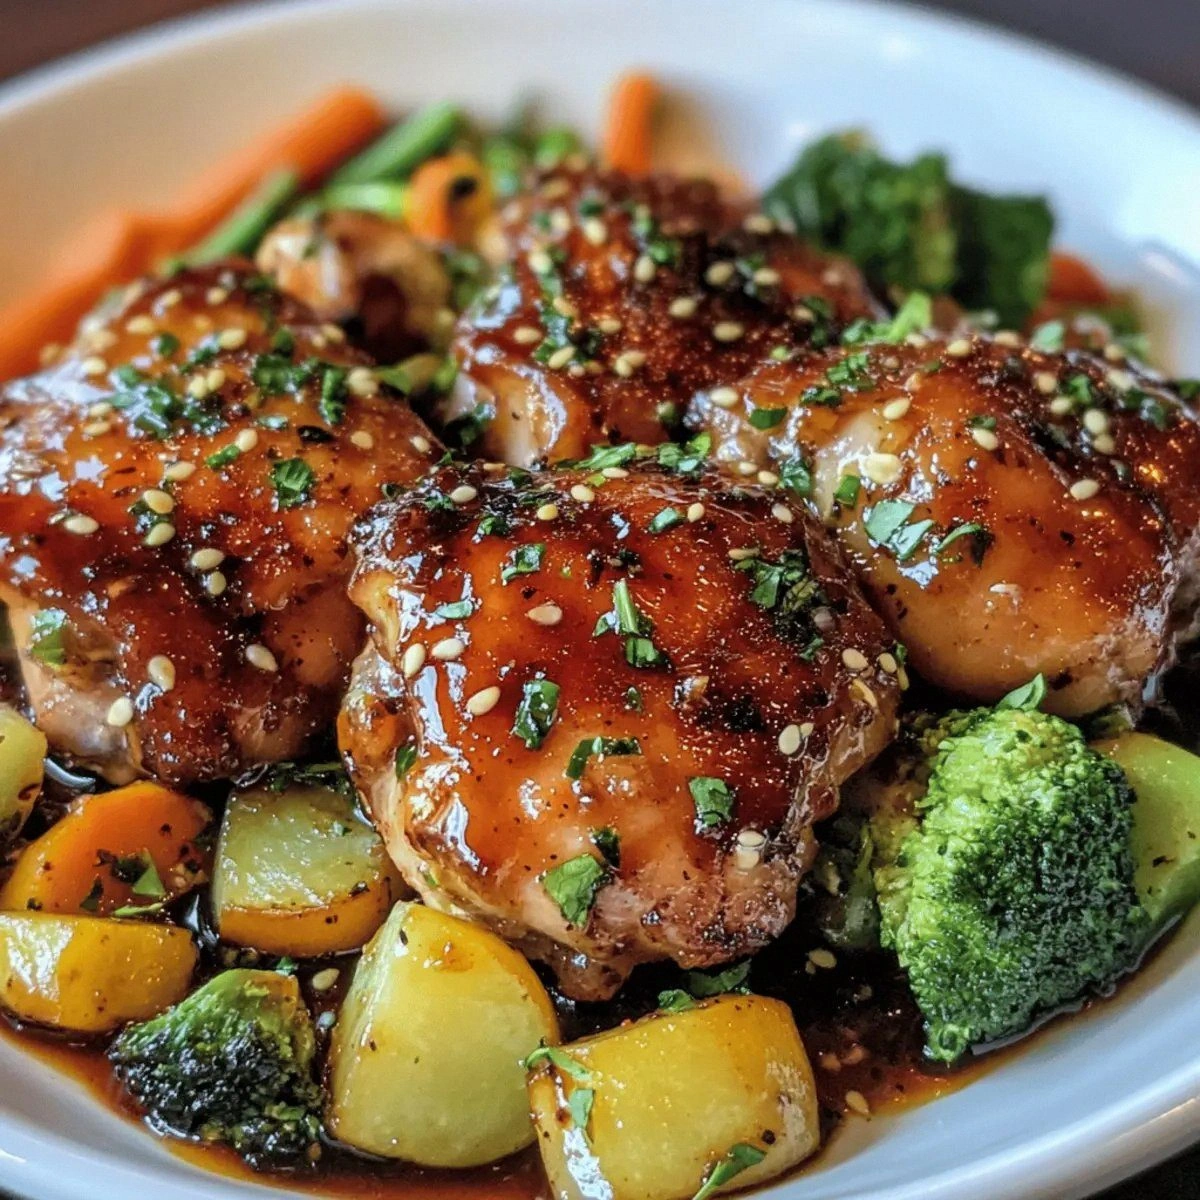
Picture this: the sweet scent of honey mingling with the sharp, garlicky aroma that wafts from the pan, the sizzling sound as the chicken hits the hot oil, and the visual transformation from a dull, browned surface to a glossy, caramelized glaze. The colors shift from the dull gray of raw chicken to a rich amber that catches the light. The texture changes as the skin crisps into a buttery crunch while the meat stays moist and tender. The first bite delivers a burst of umami, the sweetness of honey, the tang of soy, and a subtle kick from the garlic, all balanced by the earthy crunch of fresh veggies.
What makes this version of honey‑garlic chicken thighs truly stand out is that it’s not just a recipe; it’s a culinary revelation that turns a simple dinner into a memorable feast. The sauce doesn’t just coat the chicken; it forms a silky, caramelized coating that locks in juices, making each bite succulent. The vegetables aren’t just side dishes; they’re flavor partners that absorb the glaze and add a vibrant pop of color and crunch. The method is straightforward enough for a novice, yet it delivers a depth of flavor that would make a seasoned chef nod in approval. This dish is a crowd‑pleaser that can be served at a casual family dinner or an elegant dinner party with minimal fuss.
I dare you to taste this and not go back for seconds, because the combination of honey’s sweetness, garlic’s punch, and soy’s savory depth is an irresistible symphony that lingers on the palate. The skin crisps to a golden‑brown finish that shatters like thin ice, revealing a tender, juicy interior that practically melts in your mouth. The veggies, caramelized to perfection, add a satisfying crunch that keeps the dish from feeling too heavy. The result is a dish that feels both comforting and sophisticated, a balance that’s hard to find in many other recipes.
If you’ve ever struggled with chicken that turns out dry or a sauce that never sticks, you’re not alone—this recipe is designed to fix those common pitfalls. It uses a simple, foolproof technique that guarantees a glossy, flavorful coating without overcooking the meat. The honey and soy sauce create a natural glaze that reduces the risk of burning while adding a sweet, savory undertone that’s hard to beat. The method is so simple that even a first‑time cook can follow it, but the result is a dish that feels like a gourmet creation.
Picture yourself pulling this out of the oven, the whole kitchen smelling incredible, and your guests’ eyes widening as they see the golden, caramelized glaze. The moment the dish hits the table, the aroma is enough to make anyone’s mouth water. The first bite delivers a burst of flavor that makes you wonder how you ever cooked chicken any other way. Let me walk you through every single step—by the end, you’ll wonder how you ever made it any other way.
What Makes This Version Stand Out
- Flavor Depth: The combination of honey, soy sauce, and garlic creates a complex flavor profile that balances sweet, salty, and umami notes, turning a simple dish into a gourmet experience.
- Crispy Skin: The high heat searing technique locks in juices while giving the skin a buttery crunch that shatters like thin ice.
- Vegetable Harmony: The carrots, broccoli, bell pepper, and onion absorb the glaze, creating a unified dish where each component complements the others.
- Time Efficiency: Prep takes just 15 minutes, cooking 30 minutes, making it an ideal weeknight dinner that still feels special.
- Make‑Ahead Friendly: You can prepare the glaze and marinate the chicken ahead of time, allowing for a quick assembly and baking when you’re ready.
- Ingredient Quality: Using fresh, high‑quality honey and soy sauce elevates the dish, ensuring the sauce has depth rather than a generic sweetness.
- Versatility: The sauce works with other proteins like pork or tofu, making it a go‑to base for multiple meals.
- Texture Contrast: The caramelized glaze juxtaposed with the tender chicken and crisp vegetables creates a satisfying mouthfeel.
- Visual Appeal: The glossy, amber glaze and vibrant veggies make the dish look as good as it tastes.
- Health Conscious: With a balanced ratio of protein, carbs, and healthy fats, it’s a wholesome meal that doesn’t compromise on flavor.
Inside the Ingredient List
The Flavor Base
Honey is the star of the show, providing a natural sweetness that caramelizes beautifully when heated. Its subtle floral notes give the sauce a depth that plain sugar can’t match. If you skip honey, the glaze will lose its glossy sheen and the dish will feel less indulgent. For a slightly different twist, you can use maple syrup or agave nectar, but honey offers the classic balance of sweetness and viscosity.
Soy sauce brings umami and saltiness, anchoring the dish’s flavor profile. It’s essential for that savory backbone that keeps the glaze from feeling one‑dimensional. If you’re watching sodium, opt for low‑sodium soy sauce, but keep in mind you may need to add a pinch of salt to compensate. The soy sauce also reacts with the honey to create a caramelized coating that’s both flavorful and visually stunning.
Garlic cloves, minced finely, release their aromatic oils during cooking, infusing the entire dish with a warm, comforting scent. Garlic’s natural sweetness balances the honey’s sugar, and its pungency adds a layer of complexity. If you prefer a milder garlic flavor, reduce the amount to 2 cloves and pair it with a dash of garlic powder for a subtler note.
The Texture Crew
Olive oil is used for searing the chicken, providing a high smoke point that allows for a crisp skin without burning. Its fruity undertones complement the honey, adding a subtle depth to the glaze. If you prefer a neutral oil, use canola or grapeseed oil; just be aware that you’ll lose a hint of flavor that olive oil contributes.
Apple cider vinegar adds acidity, balancing the sweetness of honey and the saltiness of soy sauce. The acidity also helps tenderize the chicken, ensuring it stays moist. If you don’t have apple cider vinegar, a splash of rice vinegar or white wine vinegar can work, but keep the amount to 2 tablespoons to avoid overpowering the dish.
The Unexpected Star
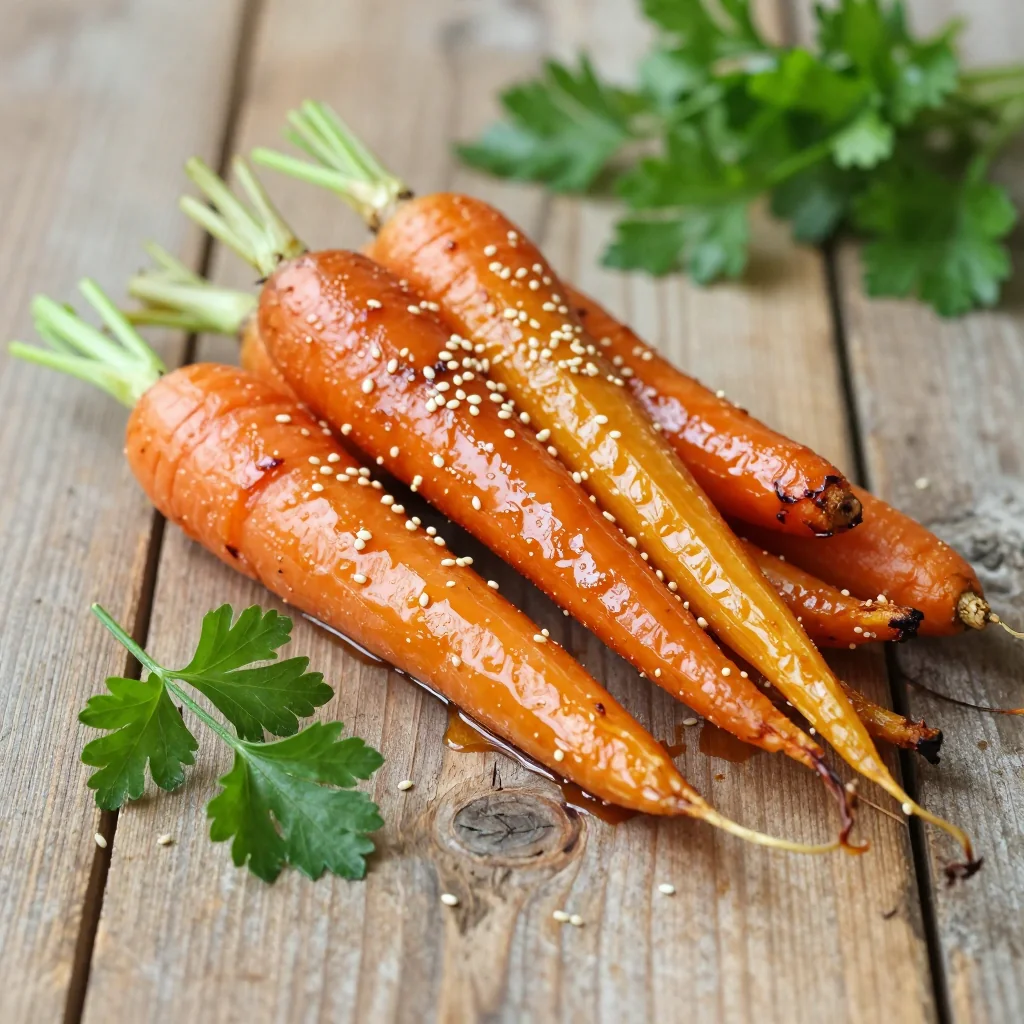
The vegetables—baby carrots, broccoli florets, red bell pepper, and red onions—are more than side dishes; they’re flavor partners that soak up the glaze and add a textural contrast. The carrots provide a subtle sweetness, the broccoli adds earthiness, the bell pepper delivers a bright crunch, and the onions contribute a caramelized caramel note. Together, they create a colorful medley that makes the dish feel complete.
When selecting vegetables, choose firm, fresh pieces to ensure they hold up during cooking. If you’re in a hurry, pre‑cut the veggies to save time, but avoid pre‑cooking them, as that can cause them to become mushy. A quick toss in a little olive oil before adding to the pan helps them retain their bright colors.
Everything’s prepped? Good. Let’s get into the real action, where the magic happens.
The Method — Step by Step
- First, season the chicken thighs with salt and pepper on both sides. Pat them dry with paper towels; moisture is the enemy of crisp skin. Place the thighs skin‑side down in a large oven‑proof skillet over medium‑high heat. The skillet should be hot enough that the skin sizzles immediately, creating a golden‑brown crust that locks in juices. Keep an eye on the heat—if the skin starts to smoke, lower the temperature slightly.
- After 4–5 minutes, flip the thighs and let them cook on the other side for 3 minutes. The goal is to render a bit of fat so the skin becomes crisp and the meat stays juicy. The skillet should have a slight sheen of oil that reflects the light, indicating the right temperature. This step is crucial; skipping it will result in uneven cooking and a soggy skin.
- Now, whisk together honey, soy sauce, minced garlic, apple cider vinegar, and olive oil in a small bowl. This glaze will coat the chicken and vegetables. Pour the mixture over the chicken, making sure each piece is well coated. The aroma should instantly fill the kitchen, promising a dish that’s both sweet and savory.
- Add the carrots and broccoli to the skillet, pushing them around so they’re in contact with the glaze. The vegetables will start to steam and absorb the sauce, turning a simple side into a flavorful accompaniment. Stir gently to avoid breaking the broccoli florets. The carrots should begin to soften within 2 minutes.
- Place the bell pepper slices and onion wedges on top of the veggies, arranging them in a single layer. This arrangement ensures even cooking and maximum flavor absorption. The bell pepper’s bright color will contrast nicely with the golden glaze, creating a visual feast.
- Transfer the skillet to a preheated oven at 375°F (190°C). The oven will finish cooking the chicken through while the glaze caramelizes. The chicken should reach an internal temperature of 165°F (74°C). The glaze will thicken and become glossy, coating the meat and veggies in a caramelized sheen.
- Bake for 25–30 minutes, checking the internal temperature at the 25‑minute mark. If the glaze is too thin, let it bake a few more minutes; if it’s too thick, add a splash of water or chicken broth to loosen it slightly. The final result should be a golden‑brown glaze with a slightly sticky texture.
- Remove the skillet from the oven and let the chicken rest for 5 minutes before serving. Resting allows the juices to redistribute, keeping the meat moist. While the chicken rests, drizzle any remaining glaze over the veggies for an extra burst of flavor.
- Serve the chicken thighs with the glazed vegetables on the side or tossed together in a large bowl. Garnish with a sprinkle of sesame seeds or chopped green onions for a pop of color and an added layer of flavor. The dish is ready to impress, and the aroma alone will have your guests begging for seconds.
That's it—you did it. But hold on, I've got a few more tricks that'll take this to another level. Keep reading, because the next section is packed with insider tips that will elevate your dish from good to unforgettable.
Insider Tricks for Flawless Results
The Temperature Rule Nobody Follows
Many people over‑cook their chicken, thinking more heat means better flavor. In reality, a medium‑high heat of 400°F (204°C) is optimal for a crisp skin while keeping the interior juicy. Use a thermometer to ensure the internal temperature hits 165°F (74°C) without overcooking. I’ve tried it on a 450°F (232°C) pan, and the result was a dry, over‑seared chicken that lacked the succulent texture this recipe delivers.
Why Your Nose Knows Best
When you smell the glaze starting to caramelize, you know the timing is right. A sweet, caramel aroma indicates the sugars are browning, while a sharp, acrid smell signals burning. Pause the heat and stir if the scent turns too sharp. My kitchen once had a runaway sauce that smelled like burnt sugar—don’t let that happen to you.
The 5‑Minute Rest That Changes Everything
Resting the chicken for 5 minutes after baking is essential for retaining moisture. The juices redistribute, preventing them from spilling out when you cut into the meat. This simple step can mean the difference between a dry thigh and a juicy, melt‑in‑your‑mouth experience.
Use Fresh Garlic for a Punchier Flavor
Fresh garlic adds a bright, aromatic quality that powdered garlic cannot replicate. Mince the garlic finely to release maximum flavor. If you’re short on time, a garlic press does the trick, but the texture may be slightly different. My friend once used garlic powder and complained that the dish felt flat; don’t make the same mistake.
Add a Splash of Water Before Reheating
When reheating leftovers, a splash of water or broth prevents the glaze from drying out. It reintroduces steam, keeping the chicken moist. Add a tablespoon of water to the skillet, cover, and heat over low heat until steaming. This trick turns a reheated dish back into a freshly cooked masterpiece.
Use a Cast‑Iron Skillet for Even Heat Distribution
A cast‑iron skillet retains heat better than stainless steel, ensuring the chicken cooks evenly and the glaze caramelizes uniformly. The skillet’s weight also helps keep the vegetables from sliding around. I’ve used a cast‑iron skillet in the past, and the results were consistently superior.
Let the Sauce Simmer Before Adding the Chicken
Simmering the glaze for 5 minutes before adding the chicken allows the flavors to meld and the sugars to reduce slightly, creating a thicker coating. The result is a glaze that sticks better and has a richer taste. I’ve found that simmering the sauce first brings out a deeper caramel flavor that the chicken then absorbs.
Add a Dash of Red Pepper Flakes for Heat
If you like a bit of spice, sprinkle a pinch of red pepper flakes into the glaze. The heat will contrast with the sweetness of honey, creating a balanced flavor profile. The flakes also add a subtle visual pop of color that makes the dish more appetizing.
Creative Twists and Variations
Tropical Twist with Pineapple
Swap the honey for a mixture of honey and crushed pineapple chunks to add a tropical sweetness that pairs beautifully with the savory glaze. The pineapple’s natural acidity balances the honey’s richness, while the chunks provide a juicy burst. This version is perfect for a summer dinner party and will impress guests with its vibrant flavors.
Mediterranean Flair with Olives
Add sliced kalamata olives to the skillet for a briny Mediterranean touch. The olives’ saltiness complements the soy sauce, while their oil content adds richness to the glaze. Serve over a bed of couscous for a complete Mediterranean meal that feels both exotic and comforting.
Spicy Cajun Kick
Incorporate a teaspoon of Cajun seasoning into the glaze for a smoky, spicy kick. The heat from the seasoning balances the honey’s sweetness, creating a flavor profile that’s both bold and balanced. Pair with a side of cornbread for a southern twist.
Herb‑Infused Variation
Stir in a handful of fresh thyme or rosemary into the glaze before cooking. The herbs add depth and a fragrant aroma that elevates the dish. This variation works well with a side of roasted potatoes, creating a comforting, herb‑rich meal.
Vegan Version with Tofu
Replace the chicken thighs with firm tofu, pressed and sliced into thick slabs. Marinate the tofu in the honey‑garlic glaze for 30 minutes before searing. The tofu absorbs the sauce, resulting in a plant‑based dish that’s just as flavorful and satisfying.
Low‑Carb Variation with Cauliflower Rice
Swap the carrots and broccoli with cauliflower rice for a low‑carb option. The cauliflower rice will soak up the glaze, providing a creamy texture that pairs well with the chicken. This version is ideal for those following a ketogenic or low‑carb diet.
Asian Fusion with Sesame Seeds
Sprinkle toasted sesame seeds over the finished dish for an added crunch and nutty flavor. The sesame seeds also add a subtle nutty aroma that complements the soy sauce. Serve with a side of steamed jasmine rice for a complete Asian fusion meal.
Breakfast‑Style with Egg
Add a fried or poached egg on top of the chicken thighs for a breakfast twist. The runny yolk will mingle with the glaze, creating a rich, velvety sauce. This variation is perfect for a weekend brunch or a hearty breakfast for the family.
Storing and Bringing It Back to Life
Fridge Storage
Store leftovers in an airtight container in the refrigerator for up to 3 days. The glaze will thicken slightly, but it remains flavorful. Keep the chicken and veggies separate if you prefer to reheat them individually.
Freezer Friendly
Freeze the dish in a freezer‑safe container for up to 2 months. Thaw overnight in the refrigerator before reheating. The texture of the chicken remains juicy, and the glaze retains its glossy finish.
Best Reheating Method
Reheat in a skillet over medium heat, adding a splash of water or broth to keep the glaze from drying out. Stir gently until heated through, then finish with a quick sear on the skin to restore crispness. This method preserves the original texture and flavor profile.
Reheating Tips
If the glaze has thickened during storage, add a tablespoon of water or broth to loosen it before reheating. This ensures the sauce remains glossy and flavorful. Always use a low to medium heat to avoid overcooking the chicken.