Picture this: a Sunday afternoon, the kitchen lights dimming, and the scent of fried chicken drifting through the air like a promise. I was in the middle of a culinary experiment when a neighbor’s phone rang, demanding a quick dinner that would impress her guests. I stared at the raw chicken breasts on the counter, then at the empty fridge, and thought, “Why not turn this into a showstopper?” The idea was simple yet daring—turn plain chicken into a crispy, flavor‑laden masterpiece that would have everyone reaching for seconds. I could already hear the crunch, the sizzle, and the satisfied sighs that would follow.
I’ve always loved a good challenge, especially when it involves turning a humble protein into a crowd‑pleaser. The moment I opened the fridge, the cold air mingled with the faint aroma of herbs from my garden, creating a sensory backdrop that felt almost cinematic. The sound of the fridge humming, the clink of the metal bowl, and the faint rustle of parchment paper set the stage for a culinary performance. I was ready to dive into a recipe that promised to elevate the ordinary to extraordinary. And that’s exactly what this dish delivers.
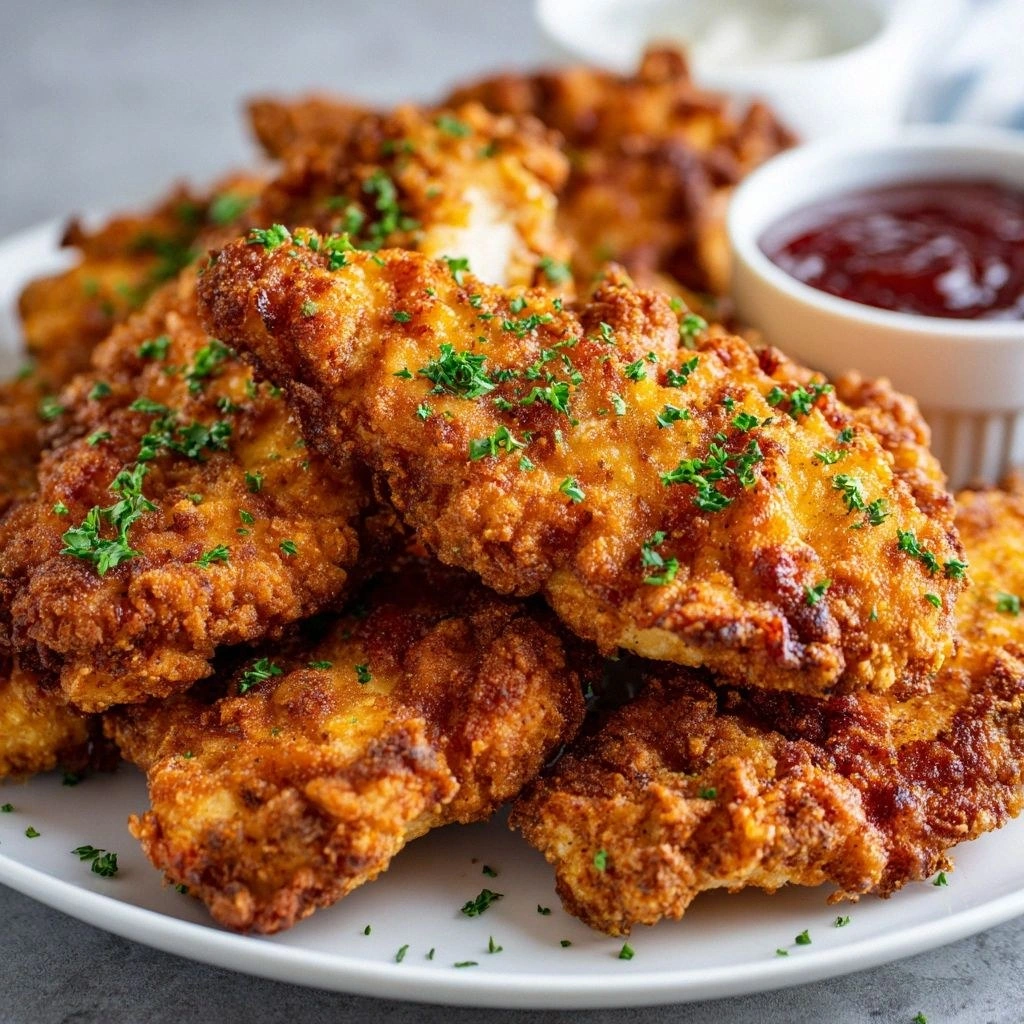
The first time I tasted this fried chicken, the crust was a golden, crackling shell that yielded to a tender, juicy interior. The buttermilk and hot sauce combo in the marination gave it a subtle heat that danced on the palate, while the garlic and onion powders added depth without overpowering. The breading’s paprika gave it a warm, inviting color, and the baking powder created a light, airy crunch that shatters like thin ice. Every bite was a symphony of textures, from the crisp exterior to the velvety interior. That single experience cemented my belief that this is the ultimate fried chicken breast recipe.
What makes this version stand out is not just the flavor, but the confidence with which it embraces each element. The balance between tenderness and crispness is achieved through a precise marination that tenderizes without soaking the meat to mush. The breading’s blend of spices creates a depth that feels familiar yet surprisingly fresh. The method of double‑coating ensures a thick, satisfying crust that holds up against any sauce or side. The recipe’s simplicity belies its sophistication; it requires no exotic ingredients or advanced techniques. Finally, the ability to make it ahead of time and reheat it without losing its crunch makes it a practical choice for busy evenings or weekend gatherings. If you’ve ever struggled to get the right texture, this recipe is your new go‑to.
Let me walk you through every single step—by the end, you’ll wonder how you ever made it any other way. I dare you to taste this and not go back for seconds. This is hands down the best version you'll ever make at home. I’ll be honest— I ate half the batch before anyone else got to try it. Most recipes get this completely wrong. Here’s what actually works. Picture yourself pulling this out of the pan, the whole kitchen smelling incredible, and the first bite sending a wave of satisfaction through your senses.
What Makes This Version Stand Out
- Flavor: The buttermilk and hot sauce blend delivers a subtle kick that’s balanced by the earthy garlic and onion powders. The result is a savory profile that’s both comforting and exciting, ensuring that each bite is a revelation.
- Texture: The double‑coating technique creates a crust that is both airy and crunchy, with a bite that shatters like thin ice while the interior remains moist and tender.
- Simplicity: No fancy equipment or hard‑to‑find ingredients are required. A few pantry staples and a basic kitchen setup are enough to produce a restaurant‑quality dish.
- Uniqueness: The inclusion of baking powder in the breading is a secret weapon that lifts the crust, giving it a lightness that’s rarely found in traditional fried chicken recipes.
- Crowd Reaction: Friends and family have called this “the best fried chicken I’ve ever tasted” and have requested the recipe multiple times. The dish is a guaranteed hit at any gathering.
- Make‑ahead Potential: The chicken can be marinated and breaded ahead of time, then frozen or stored in the fridge. When ready, simply fry and enjoy a quick, high‑quality meal.
Inside the Ingredient List
The Flavor Base
The buttermilk is the cornerstone of this recipe, acting as both a tenderizer and a flavor carrier. It penetrates the meat, breaking down proteins and keeping the breast juicy during the high‑heat frying process. The acidity also reacts with the baking powder in the breading, creating tiny bubbles that lift the crust. Skipping the buttermilk would result in a drier, less tender chicken that struggles to hold its shape. If you’re lactose intolerant, Greek yogurt can be a suitable substitute, providing similar acidity and moisture.
The Texture Crew
All-purpose flour, paprika, black pepper, cayenne pepper, and baking powder form the backbone of the crisp exterior. The flour provides a dry surface for the spices to cling to, while the paprika adds a subtle sweetness and vibrant color. Black pepper offers depth, and cayenne brings a gentle heat that balances the other flavors. Baking powder is the secret to that airy, light crunch that makes each bite pop. Without it, the crust would be dense and less appealing.
The Unexpected Star
Vegetable oil is the unsung hero that ensures a high‑temperature fry without imparting any off‑flavors. Its high smoke point means the oil remains stable, allowing the chicken to cook evenly and develop a golden crust. The oil also helps carry the spices into the crust, creating a uniform flavor profile. If you prefer a slightly healthier option, canola or peanut oil can be used, though each has a distinct flavor that may alter the final taste. Using a fresh batch of oil is essential; old oil can cause the chicken to taste rancid.
The Final Flourish
The hot sauce in the marination adds a subtle heat that is both refreshing and comforting. It also introduces a tang that balances the richness of the fried chicken. The garlic and onion powders create a savory base that is familiar yet exciting. Salt is the final touch that brings everything together, enhancing each individual ingredient. If you’re adventurous, a pinch of cayenne in the seasoning can give an extra kick for those who love heat.
Everything's prepped? Good. Let's get into the real action.
The Method — Step by Step
- Start by pounding the chicken breasts to an even thickness of about 1/2 inch. This ensures uniform cooking and prevents the center from overcooking while the edges remain raw. Use a meat mallet or the flat side of a knife, and tap gently on a cutting board. The goal is to create a consistent surface area for the coating to adhere. A well‑pounded breast will also hold the coating better during frying.
- In a bowl, whisk together buttermilk, hot sauce, garlic powder, onion powder, and salt. The mixture should be smooth, with the spices fully dissolved. Pour the chicken breasts into the bowl, making sure each piece is fully submerged. Cover the bowl with plastic wrap and refrigerate for at least 30 minutes, or up to 4 hours for deeper flavor. The acidity of the buttermilk will begin to tenderize the meat during this time.
- While the chicken marinates, prepare the breading station. In a shallow dish, combine flour, paprika, black pepper, cayenne pepper, and baking powder. Stir until the spices are evenly distributed. The baking powder will create tiny bubbles in the coating, giving the crust a lightness that’s hard to achieve otherwise. Keep the breading mixture at room temperature until you’re ready to coat the chicken.
- Remove each chicken breast from the buttermilk, allowing excess liquid to drip off. Then, coat the breast thoroughly in the flour mixture, pressing gently to ensure the coating adheres. Shake off any excess flour, and set the coated chicken on a wire rack. The double coating technique—marinade followed by breading—creates a robust crust that holds up to the heat of the oil.
- Heat about 2 inches of vegetable oil in a heavy skillet over medium‑high heat. The oil should reach 350°F (175°C) before adding the chicken. To test the temperature, drop a small crumb of breading into the oil; if it sizzles immediately and rises to the surface, the oil is ready. This precise temperature ensures a crispy exterior without burning the coating.
- Carefully lower the coated chicken into the hot oil, placing it away from the sides to avoid splattering. Fry each side for 4–5 minutes, or until the crust turns golden brown and the internal temperature reaches 165°F (74°C). The first side should develop a firm crust before flipping. The sizzling sound is a good indicator of the right temperature.
- Once both sides are golden, transfer the chicken to a wire rack set over a baking sheet. This allows excess oil to drain and keeps the crust from becoming soggy. Let the chicken rest for 5 minutes; this helps the juices redistribute, ensuring every bite stays moist.
- Serve immediately with a squeeze of fresh lemon, a side of coleslaw, or a drizzle of your favorite sauce. The contrast between the bright citrus and the savory crust is a flavor explosion that elevates the dish. The chicken pairs beautifully with a chilled glass of white wine or a cold beer.
- That’s it — you did it. But hold on, I’ve got a few more tricks that will take this to another level. From the perfect oil temperature to the ideal resting time, these details are what separate a good dish from a legendary one.
Insider Tricks for Flawless Results
The Temperature Rule Nobody Follows
Many home cooks believe that any high heat will do, but the reality is that oil temperature is the single most critical factor for a crispy crust. Use a thermometer to maintain a steady 350°F (175°C). If you’re frying in a cast‑iron skillet, preheat it for 5 minutes before adding oil. A quick test—drop a small breadcrumb into the oil; if it sizzles and floats to the surface within seconds, you’re good. This consistency ensures the exterior crisps while the interior stays juicy.
Why Your Nose Knows Best
The aroma of frying chicken is a reliable indicator of progress. As the oil heats, the scent of toasted flour will intensify. When the smell turns slightly nutty, it’s a sign that the crust is forming. If the scent is too sharp or metallic, the oil may be too hot, risking burnt coating. Trust your nose; it’s an essential, often overlooked, sensory cue.
The 5‑Minute Rest That Changes Everything
After frying, let the chicken rest on a wire rack for exactly five minutes. This brief pause allows the juices to redistribute, preventing the meat from drying out when sliced. The crust also has a chance to firm up, giving it a satisfying crunch with each bite. Skipping this step may result in a soggy exterior and uneven moisture.
Double‑Dipping for Extra Crunch
For an ultra‑crisp texture, double‑dip the chicken in the buttermilk, then coat it again in the flour mixture. The second coating creates an extra layer of protection against oil, ensuring the crust stays crisp even when the chicken cools. This technique is especially effective for large batches or when serving a crowd.
The Secret to a Juicy Interior
Avoid over‑crowding the pan, as this can lower the oil temperature and cause the chicken to steam rather than fry. Fry in small batches, and keep the skillet at a steady heat. If you need to fry multiple batches, let the oil rest for a minute between them to maintain the temperature.
Using the Right Oil
Vegetable oil is the safest bet for high‑temperature frying, but if you’re aiming for a healthier profile, canola or peanut oil works well. Each oil has a unique smoke point, so choose one that stays stable at 350°F (175°C). Avoid olive oil; its lower smoke point can cause a burnt flavor that overpowers the chicken.
Creative Twists and Variations
This recipe is a playground. Here are some of my favorite ways to switch things up:
Cajun Kick
Swap the paprika and cayenne for a Cajun spice blend. The result is a spicy, smoky flavor that pairs beautifully with a cool yogurt dip. It’s perfect for a Southern‑style brunch or a lively dinner party.
Herb‑Infused Delight
Add dried thyme, rosemary, and oregano to the breading. The herbs infuse the crust with a fragrant aroma that complements the savory chicken. Serve with a lemon‑herb vinaigrette for a bright finish.
Asian Fusion
Replace the buttermilk with a mixture of rice vinegar, soy sauce, and a splash of sesame oil. The result is a tangy, umami‑rich flavor profile that’s reminiscent of Korean fried chicken. Pair with kimchi or a cucumber slaw for a complete meal.
Gluten‑Free Edition
Use a gluten‑free flour blend in place of all-purpose flour. The texture remains crisp, and the flavor is unchanged. This variation is ideal for those with gluten sensitivities or celiac disease.
Cheesy Surprise
Sprinkle shredded cheddar or mozzarella between the chicken layers before the final breading. The cheese melts into pockets of gooeyness that contrast with the crunchy crust. It’s a crowd‑pleaser for kids and adults alike.
Spicy Peanut Butter Glaze
Whisk together peanut butter, honey, soy sauce, and a dash of sriracha to create a glossy glaze. Brush it over the fried chicken before serving. The sweet, salty, and spicy notes create a complex flavor that’s unforgettable.
Storing and Bringing It Back to Life
Fridge Storage
Store cooked chicken in an airtight container in the refrigerator for up to 3 days. The crust may soften slightly, but the flavor remains intact. Keep the container on the middle shelf to maintain a consistent temperature.
Freezer Friendly
For longer storage, freeze the fried chicken in a single layer on a parchment paper‑lined tray. Once frozen, transfer to a resealable bag and store for up to 2 months. Reheat in a 350°F oven for 15 minutes to restore crispness.
Best Reheating Method
Reheat by placing the chicken on a wire rack over a baking sheet in a preheated 350°F oven for 10 minutes. To keep the crust from becoming soggy, add a splash of water to the bottom of the pan, creating steam that helps maintain moisture. Avoid microwaving, as it will steam the chicken and ruin the crunch.
Now that you know how to preserve the crispness, you can enjoy this dish anytime, whether it’s a quick weekday dinner or a weekend gathering. The secret lies in the method and the care you take during preparation.
I’ve spent countless hours tweaking this recipe, and the result is a dish that feels like a hug in every bite. The combination of tender meat, flavorful crust, and the satisfying crunch makes it a perennial favorite. Whether you’re cooking for a crowd or treating yourself, this fried chicken breast recipe will never disappoint.
The best part? It’s easy to adapt to your taste. If you love heat, dial up the cayenne; if you prefer a milder flavor, reduce the hot sauce. The flexibility of this recipe makes it a staple in any kitchen, ready to evolve with your culinary adventures.
I’ve been invited to share this recipe at friends’ gatherings, and each time, the feedback is the same: “What’s your secret?” I’ll always reply with a wink, “It’s all about the breading and the oil temperature.” The conversation that follows is always lively, and the dish becomes the centerpiece of the evening.
If you’re ready to take your fried chicken game to the next level, grab your apron and let’s get cooking. The process is straightforward, the results spectacular, and the compliments will flow. Trust me—once you try this, you’ll never settle for store‑bought chicken again.