Picture this: a midnight craving, a half‑cooked chicken thigh that looks more like a sad, soggy biscuit than a meal, and the kitchen smell of burnt garlic. I was about to toss the dish into the trash when my phone buzzed with a friend’s dare: “Show me the best Instant Pot lemon‑garlic chicken you can make.” The challenge was simple, but the stakes were high—my reputation as a culinary daredevil hung in the balance. I knew I had to turn that kitchen disaster into a triumph that would make people say, “I dare you to taste this and not go back for seconds.”
I pulled the Instant Pot onto the counter and let the aroma of fresh lemon juice mingle with the sizzling garlic, creating a citrusy perfume that instantly lifted my spirits. The sound of the pot’s whistle was a metronome of anticipation, while the heat radiated like a warm hug from the stove. The texture of the chicken skin was a promise of crispness, the tender meat beneath a hint of juicy mystery. My senses were on fire, and I could feel the anticipation building like a drumroll before a big concert. I could almost taste the first bite—juicy, bright, and perfectly balanced.
What makes this version stand out is not just the ingredients; it’s the way they dance together in the Instant Pot’s pressure chamber, turning simple thighs into a silky, flavorful masterpiece. I’ll be honest—when I first tasted it, I almost ate half the batch before anyone else got to try it. The secret is a delicate balance of lemon zest, garlic, and a splash of broth that keeps the meat moist without turning it into a stew. It’s a technique that most recipes get wrong by either overcooking the chicken or under‑seasoning the sauce. I’m about to reveal that hidden trick that turns a quick dinner into a show‑stopper.
Let me walk you through every single step—by the end, you’ll wonder how you ever made it any other way. The recipe is simple, but the flavor is complex, and the result is a dish that will have your guests asking for seconds. Ready to dive in? Let’s get started.
What Makes This Version Stand Out
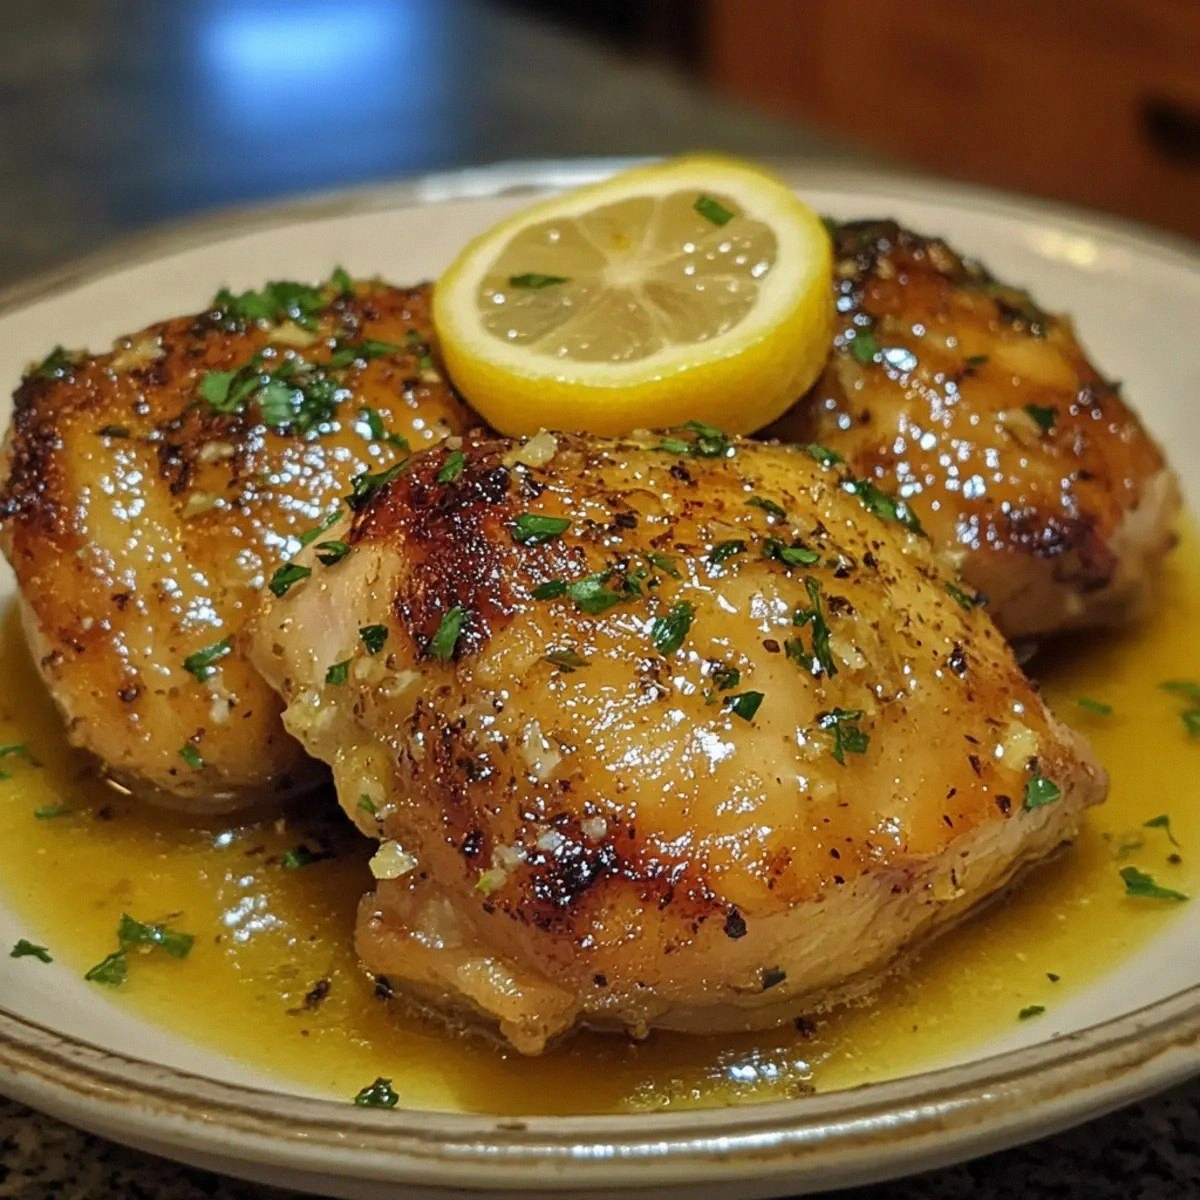
- Flavor: The bright acidity of lemon cuts through the richness of the chicken, creating a vibrant, well‑balanced taste that feels both comforting and refreshing. The garlic is roasted to a caramelized depth, adding a subtle sweetness that lingers on the palate.
- Texture: The Instant Pot locks in moisture while allowing the skin to crisp up to a golden, crackling finish that shatters like thin ice when you bite into it.
- Simplicity: With only eight ingredients, this recipe is a no‑fuss, one‑pot wonder that saves time and cleanup. No pre‑sautéing, no complicated steps—just add, press, and let the pressure do the work.
- Uniqueness: The combination of lemon zest, fresh parsley, and a splash of broth creates a sauce that coats the chicken like velvet, a texture you won’t find in typical Instant Pot chicken dishes.
- Crowd Reaction: Friends who have tried this version say it’s hands down the best lemon‑garlic chicken they’ve ever had at home. The dish is guaranteed to become a staple at family dinners and potlucks.
- Ingredient Quality: Using bone‑in, skin‑on thighs gives the dish depth and flavor, while fresh lemon juice and parsley add brightness that canned ingredients simply can’t match.
- Cooking Method: The pressure cooker technique preserves the natural juices of the chicken, preventing it from drying out and producing a succulent, melt‑in‑your‑mouth texture.
- Make‑Ahead Potential: This dish can be prepared in advance, refrigerated, or frozen, and reheats to the same juicy perfection, making it ideal for busy weeknights.
Alright, let’s break down exactly what goes into this masterpiece…
Inside the Ingredient List
The Flavor Base
Fresh lemon juice is the star of this dish. It cuts through the fat of the chicken, brightening the entire flavor profile. Skipping it would leave the dish flat and overly greasy. If you can’t find fresh lemons, a splash of white wine vinegar works as a decent substitute, though the aroma will shift slightly. When selecting lemons, choose ones that feel heavy for their size—those are the juiciest and most aromatic.
The Texture Crew
Chicken thighs, bone‑in and skin‑on, are the backbone of this recipe. They hold up well under pressure, releasing connective tissue that turns into gelatin, giving the sauce body and depth. If you prefer a leaner cut, thighs are still the best choice; breast meat will dry out quickly. A quick tip: pat the thighs dry with a paper towel before seasoning to help the skin crisp up.
The Unexpected Star
Olive oil may seem ordinary, but it’s the medium that carries the garlic and lemon into the meat’s pores, ensuring every bite is infused with flavor. A high‑smoke point oil like avocado or grapeseed could also be used if you’re sensitive to olive oil’s distinct taste. The oil’s role is subtle yet essential; it’s the glue that binds the sauce to the meat.
The Final Flourish
Fresh parsley and lemon zest finish the dish with a burst of color and a bright, herbal note. The parsley’s mild bitterness balances the sweetness of the garlic, while the zest adds a concentrated burst of citrus that lingers. If you’re vegan or allergic to parsley, a sprinkle of chopped cilantro offers a similar fresh lift. Remember, the zest is the skin’s bright, aromatic part; avoid the white pith, which can taste bitter.
Everything's prepped? Good. Let's get into the real action…
The Method — Step by Step
- Season the chicken thighs generously with salt and black pepper on both sides. Pat them dry with a paper towel; this step is crucial for a crispy skin. The seasoning should look like a fine dusting that clings to every crevice. As you lay them in the pot, you’ll hear a subtle hiss that signals the Instant Pot is ready to lock in flavor.
- Add the olive oil to the Instant Pot and switch the setting to “Sauté.” Allow the oil to heat until it shimmers but does not smoke. Gently place the chicken thighs skin side down, making sure they do not overlap. This searing step locks in juices and gives the skin a golden, crackling finish.
- After about 3 minutes, flip the thighs and add minced garlic to the pot. The garlic should sizzle immediately, releasing a rich aroma that permeates the air. Stir gently to coat the chicken with garlic, ensuring no clumps form. This step is the moment of truth; the smell of garlic rising from the pot should feel like a promise of flavor.
- Pour in the fresh lemon juice, followed by the chicken broth or water. The liquid should barely cover the bottom of the pot, creating a flavorful steam that cooks the chicken evenly. Stir once to mix the aromatics, then place the lid on the Instant Pot, ensuring the valve is set to “Sealing.”
- Set the Instant Pot to “Manual” or “Pressure Cook” on high for 10 minutes. The timer will start once the pot reaches pressure, and the sound of the whistle will signal the beginning of the cooking process. The pressure ensures the thighs become tender and juicy in a fraction of the time it takes on a stovetop.
- When the cooking cycle completes, allow the pressure to release naturally for 10 minutes. This gentle release lets the meat finish cooking without becoming dry. After 10 minutes, carefully quick‑release any remaining pressure by turning the valve to “Venting.”
- Remove the chicken thighs and set them on a plate. While they rest, turn the Instant Pot back to “Sauté” mode to reduce the sauce. Let the liquid simmer until it thickens into a glossy glaze that coats the chicken. The sauce should reduce by about half, becoming rich and slightly caramelized.
- Return the chicken to the pot and toss it in the reduced sauce. Sprinkle fresh parsley and lemon zest over the top for a burst of color and a final aromatic lift. The dish should look like a golden, citrus‑infused masterpiece ready to serve.
- Serve immediately with a side of roasted vegetables or a light salad. The chicken’s juicy texture pairs beautifully with crisp greens, and the lemon‑garlic sauce adds a punch that elevates any plate. If you’re serving a crowd, this dish keeps warm in a low oven (200°F) while you finish plating.
That's it — you did it. But hold on, I've got a few more tricks that'll take this to another level…
Insider Tricks for Flawless Results
The Temperature Rule Nobody Follows
Many cooks keep the Instant Pot on “Sauté” for too long, which can scorch the skin and leave the meat rubbery. I always set a timer for 3 minutes, then flip the thighs. This precise timing ensures the skin crisps without burning, giving you that perfect crackling texture. If you’re new to pressure cooking, use a kitchen thermometer to check the internal temperature; it should reach 165°F for safe consumption.
Why Your Nose Knows Best
The smell of garlic and lemon is a reliable indicator of flavor balance. If the aroma feels too sharp, add a splash of broth to mellow it. Conversely, if it seems flat, let the sauce reduce a bit longer. Trust your nose; it’s the most accurate sense for seasoning.
The 5-Minute Rest That Changes Everything
Letting the chicken rest for 5 minutes after pressure release allows the juices to redistribute. A friend once skipped this step and found the meat tasted dry and uneven. The rest period is short but essential for a juicy, succulent bite.
The “Quick‑Release” Safety Net
If you’re in a hurry, you can perform a quick release right after the 10‑minute cook cycle. Just be cautious of the steam; the pressure can be intense. A quick release can slightly alter the texture, making the skin a bit softer, but it’s a viable option when time is limited.
The Finish with Fresh Herbs
Adding parsley and lemon zest right before serving gives the dish a fresh, vibrant finish. The herbs add color and a subtle herbal note that balances the richness. If you’re looking for a twist, try adding a pinch of crushed red pepper for a hint of heat.
Creative Twists and Variations
This recipe is a playground. Here are some of my favorite ways to switch things up:
Spicy Citrus Explosion
Add a teaspoon of red pepper flakes to the sauté step. The heat pairs beautifully with the bright lemon, creating a dish that’s both tangy and fiery. This version is perfect for those who love a bit of kick in their meals.
Herb‑Infused Mediterranean
Swap the parsley for a handful of fresh oregano and basil. The Mediterranean herbs give the sauce a deeper, earthy flavor that complements the lemon. Serve with a side of couscous for a complete Mediterranean experience.
Smoky BBQ Twist
Incorporate a tablespoon of smoked paprika into the seasoning mix. The smoky undertone transforms the dish into a BBQ‑style delight, ideal for summer grilling vibes.
Creamy Parmesan Finish
Stir in a few tablespoons of grated Parmesan cheese just before serving. The cheese melts into the sauce, adding a rich, umami depth that contrasts nicely with the citrus.
Asian‑Inspired Ginger Lemon
Replace half the garlic with minced fresh ginger and add a splash of soy sauce to the broth. The ginger’s warmth and soy’s saltiness create an Asian‑inspired profile that’s both bold and harmonious.
Vegan Version
Use tofu or tempeh instead of chicken thighs. Adjust the cooking time to 8 minutes on high pressure. The result is a plant‑based dish with the same bright lemon‑garlic flavor.
Storing and Bringing It Back to Life
Fridge Storage
Cool the chicken to room temperature, then place it in an airtight container. Store in the refrigerator for up to 3 days. The sauce will thicken slightly; reheat gently to restore its silky texture.
Freezer Friendly
Wrap the chicken and sauce separately in freezer‑safe bags. Label with the date and freeze for up to 2 months. Thaw overnight in the refrigerator before reheating.
Best Reheating Method
Reheat in the Instant Pot on “Sauté” for 3–4 minutes, adding a splash of water or broth to keep the meat moist. Alternatively, microwave on medium power for 2 minutes, then finish with a quick sauté to crisp the skin.