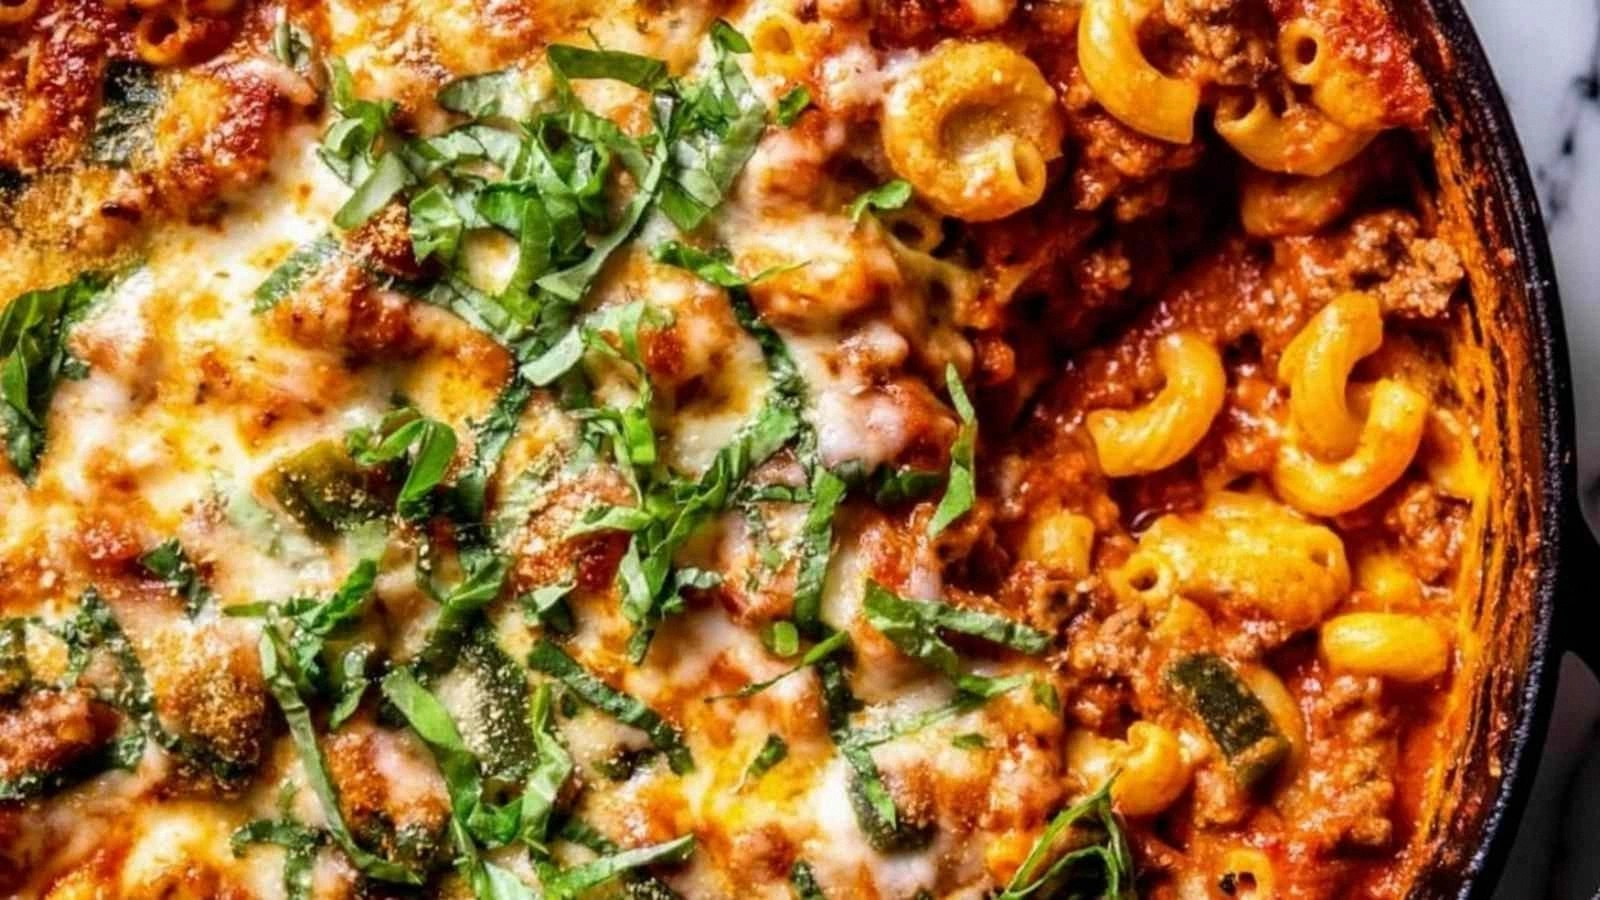
One Pan High Protein Chili Mac
Picture this: a Saturday night, the kitchen lights dimmed, and a sudden craving for comfort food that also keeps your protein bar high. I was staring at an empty fridge, the only thing left was a bag of ground beef, a can of beans, and a jar of diced tomatoes. I decided to throw everything into a single pan, hoping to create a dish that was both hearty and low on cleanup. The result was a steaming, spicy masterpiece that had my taste buds doing the salsa, and the whole house smelling like a chili factory.
That first sizzle of the beef on the skillet was like a trumpet announcing a concert. The aroma of browned meat mingled with the sharp scent of onions and garlic, and the sound of the pan clinking against the stove was music to my ears. When the bell pepper and beans joined the dance, the colors exploded—deep red, bright green, and golden tomatoes—creating a visual feast that made my eyes water in anticipation. I could already taste the creamy cheddar melting into the chili, the tang of Greek yogurt cutting through the heat, and the pasta coating itself in a silky sauce that felt like velvet on my tongue.
What makes this version stand out is that it’s not just a bowl of chili with pasta; it’s a single-pan symphony where every component plays its part. The high protein content turns a comfort dish into a post-workout reward, while the minimal cleanup keeps the kitchen drama to a minimum. The bold claim here is that this is hands down the best version you'll ever make at home—no more waiting for the pasta to cook in a separate pot or dealing with a mess of sauce on the counter. I dare you to taste this and not go back for seconds, because once you’ve had a bite, the idea of a plain bowl of mac and cheese will feel like a distant memory.
I’ve always believed that a great recipe is a conversation between the cook and the dish. If you’ve ever struggled with a chili that’s too watery or a pasta that’s overcooked, you’re not alone—and I've got the fix. Picture yourself pulling this out of the oven, the whole kitchen smelling incredible, and your guests asking for the recipe. Let me walk you through every single step—by the end, you'll wonder how you ever made it any other way.
What Makes This Version Stand Out
- Taste: The combination of chili powder, cumin, and paprika creates a depth that feels like a smoky campfire dinner, yet the Greek yogurt adds a creamy finish that balances the heat.
- Texture: The elbow macaroni is cooked al dente, providing a satisfying bite that holds up against the thick chili sauce.
- Simplicity: All ingredients cook together in one pan, eliminating the need for multiple pots or pans and cutting cleanup time in half.
- Uniqueness: The addition of Greek yogurt or sour cream at the end gives this dish a velvety twist that most chili mac recipes miss.
- Crowd Reaction: Friends who have tried this say the dish is “too good for comfort food” and keep asking for the recipe at every gathering.
- Ingredient Quality: Using fresh ground beef and canned beans with no added sugars ensures a clean, authentic flavor profile.
- Cooking Method: The one-pan technique locks in juices, letting the pasta absorb the sauce for a cohesive taste.
- Make-Ahead Potential: This dish can be prepared ahead of time and reheated without losing flavor or texture.
Alright, let's break down exactly what goes into this masterpiece...
Inside the Ingredient List
The Flavor Base
At the heart of this dish is the savory foundation of ground beef, onions, garlic, and bell pepper. The beef provides a robust, meaty backbone that carries the spices, while the onions and garlic infuse the sauce with aromatic sweetness. The bell pepper adds a subtle crunch and bright color, balancing the richness of the meat. If you skip the onions, you’ll lose a layer of depth that makes the chili feel flat. For a leaner version, you can use ground turkey or chicken, but keep in mind the flavor profile will shift slightly toward a milder taste.
The Texture Crew
Elbow macaroni, kidney beans, black beans, and diced tomatoes are the textural stars that give this dish its comforting feel. The pasta’s firm bite contrasts with the silky beans, while the tomatoes bring a juicy burst that cuts through the heat. If you prefer a chunkier sauce, use whole or diced beans instead of mashed. For a gluten-free option, swap the elbow macaroni for a small portion of quinoa or rice, though the cooking time will need adjustment.
The Unexpected Star
Greek yogurt or sour cream is the secret ingredient that elevates this chili mac from ordinary to extraordinary. It adds a creamy, tangy finish that balances the spices and prevents the dish from feeling too dry. If you’re lactose intolerant, coconut yogurt or a dairy-free sour cream works just as well. The yogurt’s thickness also helps thicken the sauce slightly, giving it a luxurious mouthfeel. A pinch of smoked paprika can be added to the yogurt to enhance the smoky undertones.
The Final Flourish
Shredded cheddar cheese and a splash of water are the finishing touches that bring everything together. The cheese melts into the sauce, creating a gooey layer that’s both comforting and indulgent. Adding a little water at the end ensures the sauce remains silky and doesn’t dry out during the final simmer. If you’re aiming for a lower sodium version, use reduced-sodium cheese and trim the salt at the end.
Everything's prepped? Good. Let's get into the real action...
The Method — Step by Step
- Heat a large, heavy-bottomed skillet over medium-high heat. Once the pan is hot, add the ground beef, breaking it apart with a wooden spoon. The beef should sizzle loudly, releasing a savory aroma that fills the kitchen. As it cooks, let it brown completely; this caramelization is key to developing depth. When the beef is browned, use a slotted spoon to transfer it to a plate, leaving the browned bits behind for extra flavor.
- In the same pan, reduce the heat to medium and add the diced onion, minced garlic, and chopped bell pepper. Stir frequently, allowing the vegetables to soften and become translucent. The onions should take about 3 minutes to release their sweetness, while the pepper adds a gentle crunch. If you notice any sticking, splash a tablespoon of water to loosen the pan. This step creates the aromatic base that will carry the chili spices.
- Add the chili powder, cumin, paprika, salt, and black pepper to the vegetables. Stir well, ensuring the spices coat every piece. The mixture should start to thicken slightly and emit a toasted aroma. This is the moment of truth—if the spices are under-seasoned, the dish will taste flat. Let the spices cook for an additional minute to develop their flavor profile.
- Pour in the diced tomatoes, kidney beans, and black beans, along with the cup of water. Stir everything together, making sure the beans are evenly distributed. The sauce should begin to bubble gently, and the mixture will start to thicken as the tomatoes release their juices. Cover the pan with a lid, reduce the heat to low, and let it simmer for 10 minutes. This slow cooking allows the flavors to meld together.
- Stir in the elbow macaroni, ensuring it’s submerged in the sauce. The pasta will absorb the liquid as it cooks, creating a cohesive, flavorful dish. Keep the lid on, and let the mixture simmer for 10 more minutes, or until the pasta is al dente. Check the pasta’s texture by tasting a small piece; it should be firm but not crunchy.
- Once the pasta is cooked, remove the lid and let the sauce reduce for a couple of minutes to achieve a slightly thicker consistency. Stir in the shredded cheddar cheese until it melts into a silky layer. The cheese should coat the pasta without clumping. Finally, fold in the Greek yogurt or sour cream, stirring until it’s fully incorporated. The sauce should be glossy, creamy, and ready to serve.
- Taste the chili mac and adjust seasoning if necessary—add a pinch more salt or a dash of hot sauce if you crave extra heat. Serve immediately, spooning the creamy sauce over each portion. Garnish with fresh cilantro or chopped green onions for a burst of color and freshness. This dish is best enjoyed hot, as the cheese remains gooey and the spices stay vibrant.
That's it — you did it. But hold on, I've got a few more tricks that'll take this to another level...
Insider Tricks for Flawless Results
The Temperature Rule Nobody Follows
Many cooks instinctively raise the heat to speed up cooking, but this can cause the pasta to become mushy and the sauce to burn. Keep the simmer at a gentle low heat, allowing the flavors to develop slowly. If you notice the liquid evaporating too quickly, add a splash of water or broth to maintain moisture. I once tried a high-heat method and ended up with a scorched bottom and a dry pasta—lesson learned.
Why Your Nose Knows Best
The aroma of the chili is your best gauge for doneness. When the sauce smells toasty and the spices are fragrant, it’s a sign that the flavors are fully integrated. A lingering raw tomato scent means you need to cook a bit longer. Trust your nose; it’s a reliable indicator that the dish is ready to serve.
The 5-Minute Rest That Changes Everything
After removing the pan from heat, let the chili mac sit, covered, for five minutes. This rest period allows the pasta to finish absorbing the sauce, and the cheese to set into a creamy consistency. I’ve found that skipping this step often results in a slightly watery sauce that needs additional simmering.
Use a Lid—But Not Too Tight
Covering the pan traps steam, helping the pasta cook evenly and the flavors meld. However, a lid that’s too tight can create excess pressure and cause the sauce to bubble over. Loosen the lid slightly to allow steam to escape while still keeping the heat contained.
Keep the Cheese Warm
Cheese can clump if it cools too quickly. To prevent this, keep the cheese in a small bowl of warm water until you’re ready to fold it in. This simple step ensures a silky, smooth sauce that coats every noodle.
Creative Twists and Variations
This recipe is a playground. Here are some of my favorite ways to switch things up:
Spicy Chipotle Kick
Add a tablespoon of chipotle in adobo sauce to the chili for a smoky heat that pairs beautifully with the cheddar. This variation is perfect for those who love a little extra bite.
Vegan Chili Mac
Swap the ground beef for crumbled tofu or lentils, and use a plant-based cheese substitute. The result is a hearty, protein-packed dish that’s entirely dairy-free.
Low-Carb Twist
Replace the elbow macaroni with spiralized zucchini or shirataki noodles. The texture changes, but the sauce still clings beautifully, creating a low-carb version that satisfies without the carb load.
Southwestern Flair
Stir in a handful of corn kernels and a splash of lime juice. The corn adds crunch, and the lime brightens the dish, giving it a fresh, southwestern vibe.
Breakfast Chili Mac
Top the finished dish with a fried egg and a sprinkle of chives. The runny yolk creates a velvety sauce, turning dinner into a satisfying breakfast.
Cheese Explosion
Use a blend of cheddar, Monterey Jack, and mozzarella for a gooey, melty experience. The different cheeses melt at varying temperatures, creating a layered melt that’s simply irresistible.
Storing and Bringing It Back to Life
Fridge Storage
Cool the chili mac to room temperature, then transfer it to an airtight container. Store in the refrigerator for up to 4 days. The pasta may absorb some liquid, so adding a splash of water or broth before reheating helps maintain the sauce’s thickness.
Freezer Friendly
For longer storage, portion the dish into freezer-safe containers and label with the date. Freeze for up to 3 months. Thaw overnight in the refrigerator before reheating.
Best Reheating Method
Reheat in a saucepan over medium-low heat, stirring occasionally. Add a tablespoon of water or broth to keep the sauce from drying out. Heat until steaming hot, about 5–7 minutes. For a quick microwave reheat, cover the container and microwave on medium for 2–3 minutes, stirring halfway through.