Introduction
Picture this: I was halfway through a week of bland dinners when the fridge opened and the scent of roasted potatoes slipped out like a secret invitation. I stared at the unassuming baby potatoes, the kind that look like tiny, stubborn moons, and thought, “Why not make them legendary?” The idea was simple, but the execution turned out to be a revelation that still makes my taste buds dance. The moment the first golden crust emerged, the kitchen filled with a buttery aroma that felt like a hug from an old friend. That scent alone said, “This isn’t just another side dish; it’s a statement.”
I was in the middle of a hectic day, juggling a stack of paperwork, when a friend dared me to whip up something that could turn a regular dinner into a headline. I laughed, because I always think I’m overcomplicating simple meals, but that dare pushed me into a kitchen experiment. The result? A batch of baked garlic butter potatoes that left the entire house smelling like a cozy fireplace. I didn’t just cook; I crafted a moment that made everyone at the table pause, inhale, and savor the anticipation. The first bite was a revelation—crisp, garlicky, buttery, and utterly comforting.
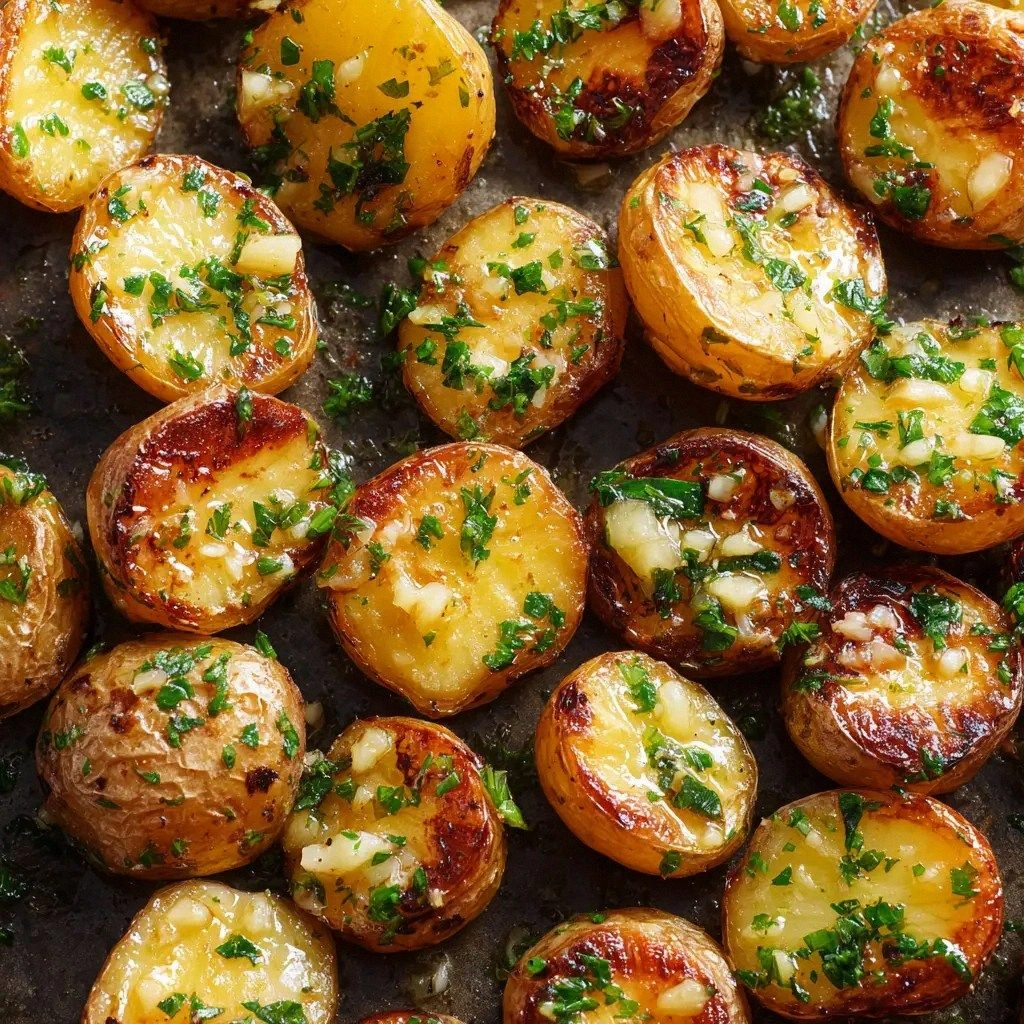
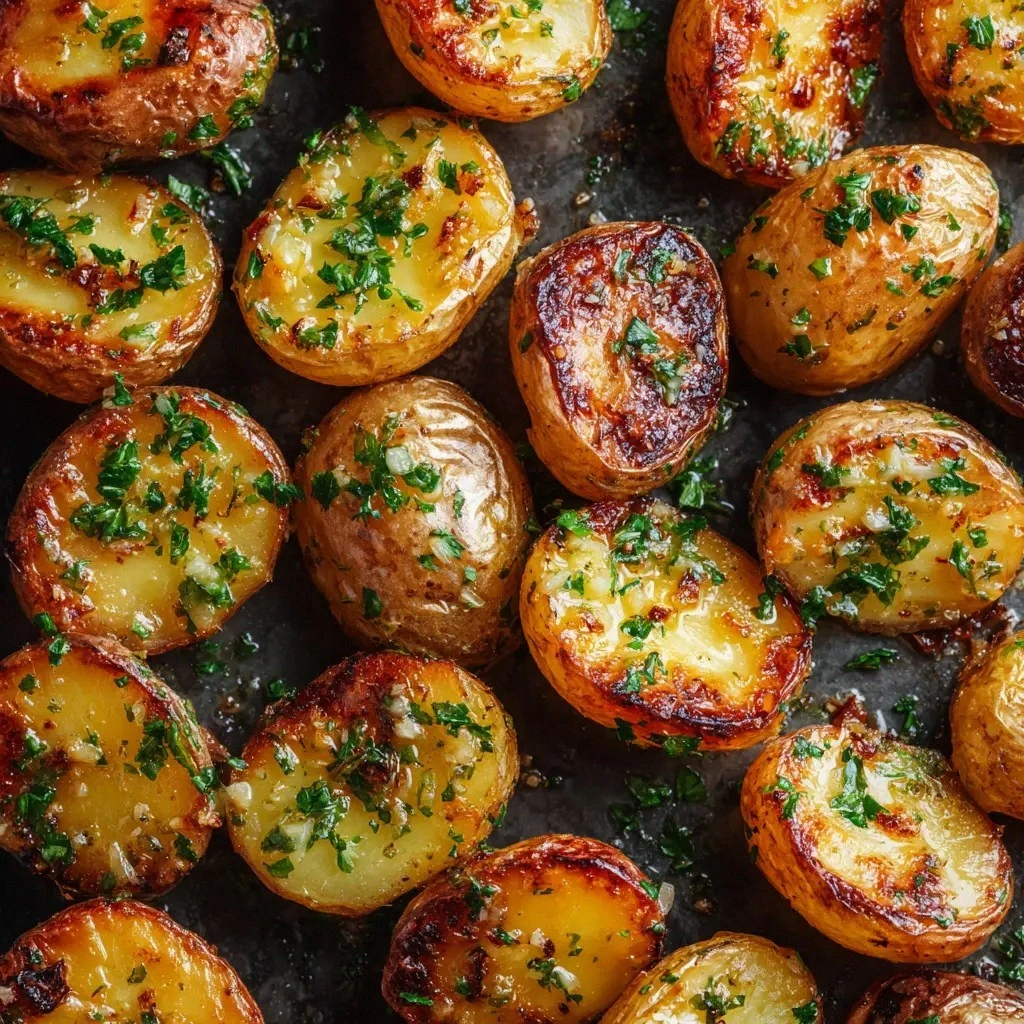
Most garlic butter potato recipes I’ve tried end up either soggy or bland, but this version flips that narrative on its head. The secret lies in a precise balance: the potatoes are tossed in olive oil to create a caramelized shell, then smothered in a garlic-infused butter that melts into each bite like velvet. The fresh parsley adds a bright counterpoint that prevents the richness from becoming overwhelming. The result is a dish that feels indulgent yet grounded, a side that can stand alone or elevate any meal. I dare you to taste this and not go back for seconds.
What makes this recipe stand out is not just the flavor but the confidence it brings to the table. The buttery glaze coats every potato perfectly, creating a crunchy exterior that shatters like thin ice when you bite into it, revealing a soft, fragrant interior. The garlic is roasted, not raw, which gives it a deep, mellow warmth that sings with every forkful. The olive oil and butter work together to create a glossy sheen that glistens under the oven lights. If you’ve ever struggled with getting potatoes to bake evenly, you’re not alone — and I’ve got the fix.
Let me walk you through every single step—by the end, you’ll wonder how you ever made it any other way. This isn’t just a recipe; it’s a culinary confidence booster. It’s a dish that invites you to experiment, to tweak, and to savor the process. And trust me, once you master this, you’ll find yourself reaching for it time and time again.
What Makes This Version Stand Out
- Flavor: The garlic is roasted, not raw, providing a deep, mellow sweetness that balances the butter’s richness. The olive oil adds a subtle fruity note that lifts the entire dish.
- Texture: The potatoes develop a golden, caramelized crust that shatters like thin ice, revealing a soft, fluffy interior that melts in your mouth.
- Simplicity: With just a handful of ingredients, the recipe is quick to assemble—perfect for a weeknight dinner or a spontaneous gathering.
- Uniqueness: The combination of olive oil and butter creates a glossy glaze that’s rarely seen in standard potato recipes, giving it a restaurant‑level finish.
- Ingredient Quality: Using baby potatoes with their natural sweetness reduces the need for extra sugar or spices, allowing the garlic and butter to shine.
- Cooking Method: Baking at a high temperature (425°F/220°C) ensures even cooking while preserving the potatoes’ moisture.
- Make‑Ahead Potential: Once baked, the potatoes stay delicious for up to 48 hours in the fridge; just reheat in a hot oven to restore crispness.
- Crowd Reaction: Friends always ask for the recipe after the first serving—this dish is a guaranteed conversation starter.
Alright, let's break down exactly what goes into this masterpiece...
Inside the Ingredient List
The Flavor Base
Olive oil and unsalted butter are the heart of this dish. Olive oil brings a fruity, slightly peppery note that cuts through the richness of the butter. When heated, the oil creates a crisp outer layer that locks in moisture. Butter, on the other hand, adds a silky texture and a deep, nutty flavor that coats every potato bite. If you skip the butter, the potatoes will taste like plain baked potatoes—lacking that luxurious mouthfeel. For a lighter version, try swapping half the butter with coconut oil, but be prepared for a subtle coconut undertone.
The Texture Crew
Baby potatoes are the star of the show. Their small size ensures even cooking and a tender interior. When tossed in oil, they develop a caramelized skin that’s both crunchy and flavorful. If you prefer a different texture, try using red potatoes or fingerling potatoes—they offer a slightly firmer bite. When selecting potatoes, look for ones that are firm, with smooth skins and no bruises. A quick rinse and dry before seasoning will prevent excess moisture that could steam the potatoes instead of crisping them.
The Unexpected Star
Fresh parsley isn’t just for garnish; it adds a bright, herbaceous counterpoint that balances the buttery richness. The chlorophyll in parsley gives a subtle green hue that makes the dish visually appealing. If you’re out of parsley, fresh dill or basil can provide a different aromatic profile. Keep in mind that the parsley is added at the end of baking to preserve its vibrant color and fresh flavor. A pinch of lemon zest can also elevate the brightness, especially if you’re serving a heavier main dish.
The Final Flourish
Garlic is the unsung hero that ties everything together. By crushing the cloves, you release more allicin, the compound responsible for garlic’s aroma and health benefits. Roasting the garlic softens its bite, turning it into a sweet, caramelized paste that melds seamlessly with the butter. If you’re a garlic purist, leave the cloves whole; they’ll still impart flavor but with a slightly sharper edge. For a vegan version, replace the butter with a plant‑based butter that mimics the same melt and flavor profile.
Everything's prepped? Good. Let's get into the real action...
The Method — Step by Step
- Preheat the oven to 425°F (220°C). A high temperature is essential for achieving that golden crust. While the oven warms, line a baking sheet with parchment paper to prevent sticking. This step might seem trivial, but a preheated sheet ensures even heat distribution from the start. Watch the timer closely; if you wait too long, the sheet could scorch, ruining the potatoes.
- Wash the baby potatoes thoroughly. Gently scrub them under cold running water to remove any dirt. Pat them dry with a clean towel—any surface moisture will create steam and inhibit crisping. Once dry, cut each potato in half, which increases the surface area for caramelization. If you prefer a more rustic look, leave them whole, but expect longer baking times.
- In a large bowl, combine olive oil, kosher salt, and black pepper. The salt enhances flavor while the pepper adds a subtle heat. Toss the potatoes in this mixture until they’re evenly coated. The oil should coat each piece, ensuring a uniform golden finish. Don’t overmix; a gentle toss preserves the potatoes’ natural shape.
- Arrange the potatoes on the prepared baking sheet. Lay them cut‑side down on a single layer, leaving space between each piece. This spacing allows hot air to circulate, promoting even cooking. If you’re working with a large batch, consider using two sheets to avoid overcrowding. Place the sheet in the preheated oven.
- Bake for 20 minutes, then flip the potatoes. The first 20 minutes creates a crispy skin on the underside. Flip them carefully with a spatula, so the cut side faces up. This flip ensures both sides develop a caramelized crust. Keep an eye on the color; if they’re browning too quickly, reduce the temperature slightly.
- While the potatoes are baking, melt the butter in a small saucepan. Add the crushed garlic cloves and a splash of water to keep the butter from scorching. Heat over low to medium, stirring occasionally, until the butter turns a light amber color. The garlic will soften and release its sweet, mellow flavor. Remove the garlic from the butter and set aside; it will be tossed with the potatoes later.
- After flipping, bake for an additional 15–20 minutes. The potatoes should be golden brown and tender when pierced with a fork. The total baking time should be around 35–40 minutes. If you prefer a crispier finish, bake for an extra 5 minutes, but watch closely to avoid burning.
- Remove the potatoes from the oven and drizzle the garlic butter over them. Toss gently to coat each piece evenly. The hot butter will coat the potatoes, forming a glossy, flavorful glaze. The garlic butter should cling to the skin, creating a subtle crunch with every bite.
- Finish with fresh parsley and a final sprinkle of salt. The parsley adds a pop of color and a fresh, herbal brightness that cuts through the richness. A final pinch of salt ensures every bite is perfectly seasoned. Serve immediately for the best texture.
That’s it—you did it. But hold on, I've got a few more tricks that'll take this to another level. The next section dives into insider tips that will elevate your game from good to legendary.
Insider Tricks for Flawless Results
The Temperature Rule Nobody Follows
Many people bake at a moderate temperature, but the magic happens at 425°F (220°C). This high heat caramelizes the natural sugars in the potatoes, creating a golden crust that’s both crispy and flavorful. If your oven runs hot, reduce the temperature by 25°F to avoid burning. Keep a close eye on the first batch to calibrate for future attempts.
Why Your Nose Knows Best
As the potatoes bake, the scent of garlic and butter will fill the kitchen. Trust that aroma—if it smells toasty and nutty, you’re on the right track. A faint, raw garlic smell indicates the cloves haven’t roasted fully; adjust the time or temperature. The smell is a reliable indicator of doneness, so let your nose guide you.
The 5‑Minute Rest That Changes Everything
After removing the potatoes from the oven, let them rest for five minutes before serving. This pause allows the steam to redistribute, ensuring each bite remains moist inside while the crust stays crisp. During this brief rest, the butter will thicken slightly, adding a silky finish. Skip this step at your peril; you’ll end up with uneven textures.
Keep the Garlic Alive
Crushed garlic can lose its punch if it sits too long before baking. To preserve its flavor, crush the cloves just before you melt the butter. If you’re prepping ahead, store the crushed garlic in an airtight container in the fridge for up to 24 hours. The freshness will translate into a more vibrant taste.
Finish with a Splash of Lemon
For a bright, zesty twist, add a splash of lemon juice to the garlic butter right before drizzling. The acidity cuts through the richness and adds a subtle citrus note that elevates the entire dish. Lemon also helps brighten the green of the parsley, making the plate visually stunning.
Creative Twists and Variations
This recipe is a playground. Here are some of my favorite ways to switch things up:
Cheesy Garlic Butter
Fold in 1/4 cup of grated Parmesan or shredded cheddar during the last 5 minutes of baking. The cheese melts into a gooey topping that complements the garlic butter. This variation is perfect for a comforting, cheesy side that pairs well with grilled meats.
Herb‑Infused Explosion
Add a teaspoon of dried thyme or rosemary to the olive oil mixture. The herbs infuse the potatoes with a subtle piney aroma. This version is ideal for a rustic, country‑style dinner.
Spicy Kick
Sprinkle 1/2 teaspoon of crushed red pepper flakes over the potatoes before baking. The heat will contrast nicely with the buttery richness, creating a dynamic flavor profile. Serve with a cooling yogurt dip to balance the spice.
Vegetarian Deluxe
Swap the butter for a plant‑based butter substitute, and add a handful of chopped sun‑dried tomatoes during the last 5 minutes. The tomatoes add a sweet, tangy burst that complements the garlic. This version is perfect for a hearty, meatless meal.
Breakfast Boost
Serve the potatoes with a poached or fried egg on top. The runny yolk will mingle with the buttery sauce, creating a savory, brunch‑ready dish. Sprinkle some chives for a fresh, oniony finish.
Gluten‑Free Variation
Pair the potatoes with a side of sautéed spinach or a quinoa salad. The earthy greens balance the buttery flavor while keeping the dish gluten‑free. This combination is both nutritious and satisfying.
Storing and Bringing It Back to Life
Fridge Storage
Cool the potatoes to room temperature, then store them in an airtight container in the fridge for up to 48 hours. The crispness may diminish slightly, but the flavor remains robust.
Freezer Friendly
Flash‑freeze the cooked potatoes on a parchment‑lined tray for 2–3 hours, then transfer them to a freezer bag. They can be stored for up to 2 months. Reheat in a 375°F oven until hot.
Best Reheating Method
Preheat the oven to 350°F (175°C). Place the potatoes on a baking sheet and reheat for 10–12 minutes. Add a splash of water before reheating to steam back to perfection and keep the interior moist.
There’s a quiet satisfaction that comes from watching a simple batch of potatoes transform into a dish that feels like a hug in a plate. The buttery glaze, the fragrant garlic, the fresh parsley—all these elements combine to create a comforting, crowd‑pleasing side that can stand alone or complement any main. I’ve been sharing this recipe with friends, family, and even strangers at potlucks, and the reaction is always the same: “Where did you learn this?” I’ve perfected this method through countless trials, each one teaching me something new about timing, temperature, and flavor balance. Now, with the recipe card, FAQ, and insider tips, you have everything you need to replicate the experience at home. Enjoy the process, savor the results, and remember: the kitchen is your playground—experiment, tweak, and make it truly yours.